
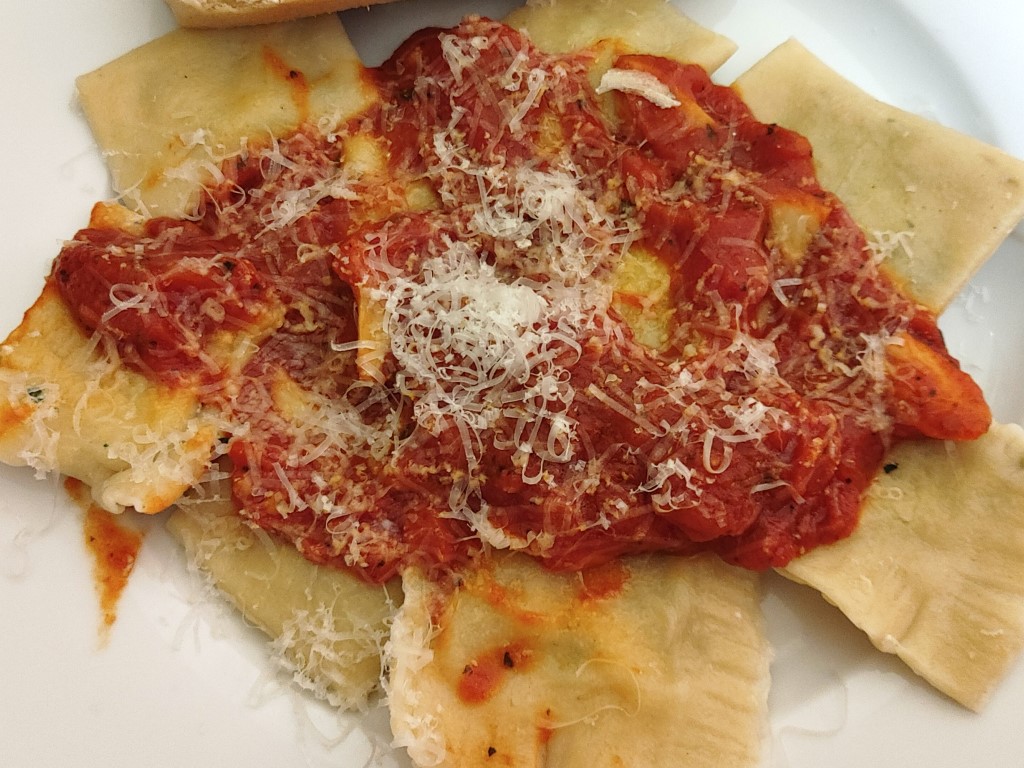
Fresh ravioli is so wonderful to have. You can stuff it with your favorite stuffing. It can be as simple as ricotta or as high-couture as truffles and caviar. Did you know that you can make ravioli using your KitchenAid mixer and a couple of attachments? Let me explain.
Sure you can make pasta by hand, roll it out with a rolling pin or a pasta roller, then stuff it and cut it. Sure. When I first started making pasta, that’s exactly what I did because I wanted to get a feel for what I was doing. Then, I got smart and I bought a stainless steel pasta roller – made plenty of fettuccine and spaghetti. It was always delicious and my dining room table was just the right thickness to secure the roller to it. I just sat there and rolled.
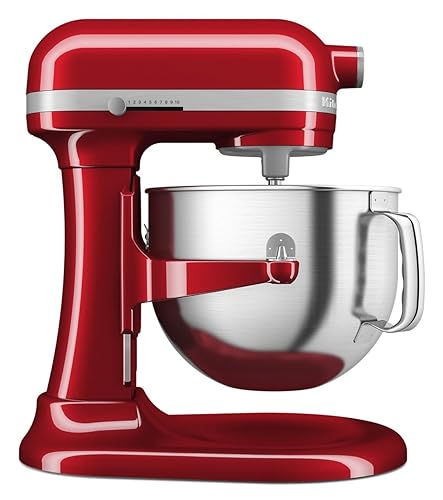
Use a Stand Mixer for Fresh Ravioli
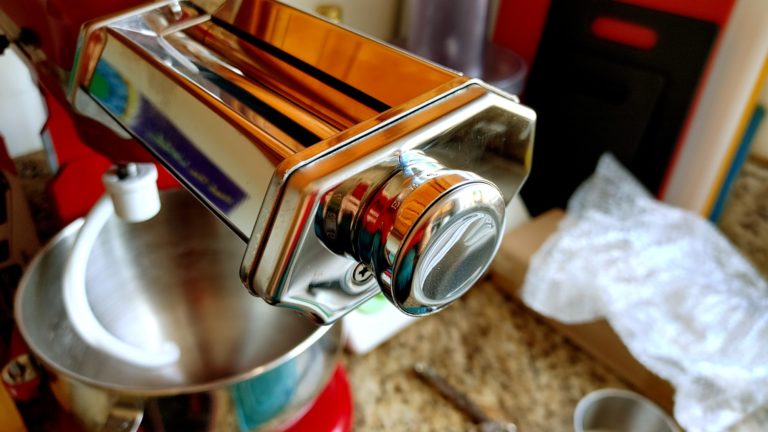
Why not use attachments for the KitchenAid and let the KitchenAid do the work? KitchenAid mixers have a port under the logo on the front of the machine. In some older models, you have to unscrew the black screw on the side to access to attachment port. In the newer models, the logo flips up and you remove the screw to put the attachment in the port then screw it in to tighten and secure the attachment in the port. The pasta attachment comes with a roller for rolling out the dough and a fettuccine and spaghetti roller. The ravioli attachment is hand-turned, it’s just a lot easier to fill it and roll the dough.
There are recipes for fresh pasta all over the Internet. You are welcome to use the recipe you like or you can use mine. The important part is that the pasta should not be too wet or too dry to roll it. The best flour to use is 00 flour, but you can use all-purpose as I do with semolina. I keep semolina on hand because I like the chewiness it gives pizza dough.
Email Me the Recipe
Enter your email address and we will send it straight to your inbox.
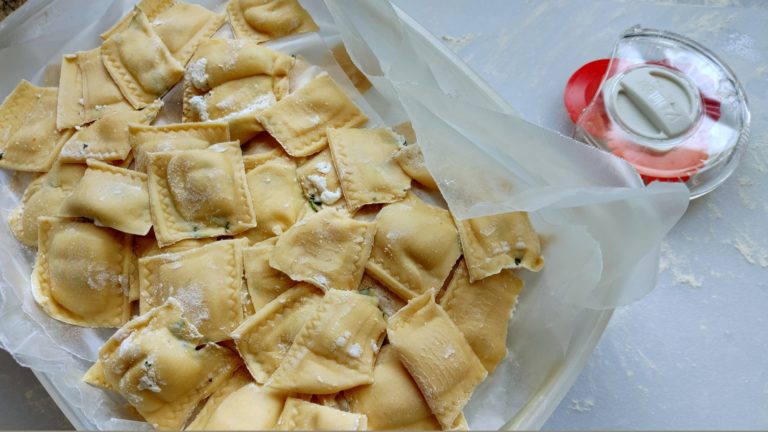
Fresh Ravioli
Tips from the Chef
Equipment

If you purchase any of the products through these affiliate links, I get a few pennies that help keep The Good Plate open. I use these products myself and want you to be able to easily find them.
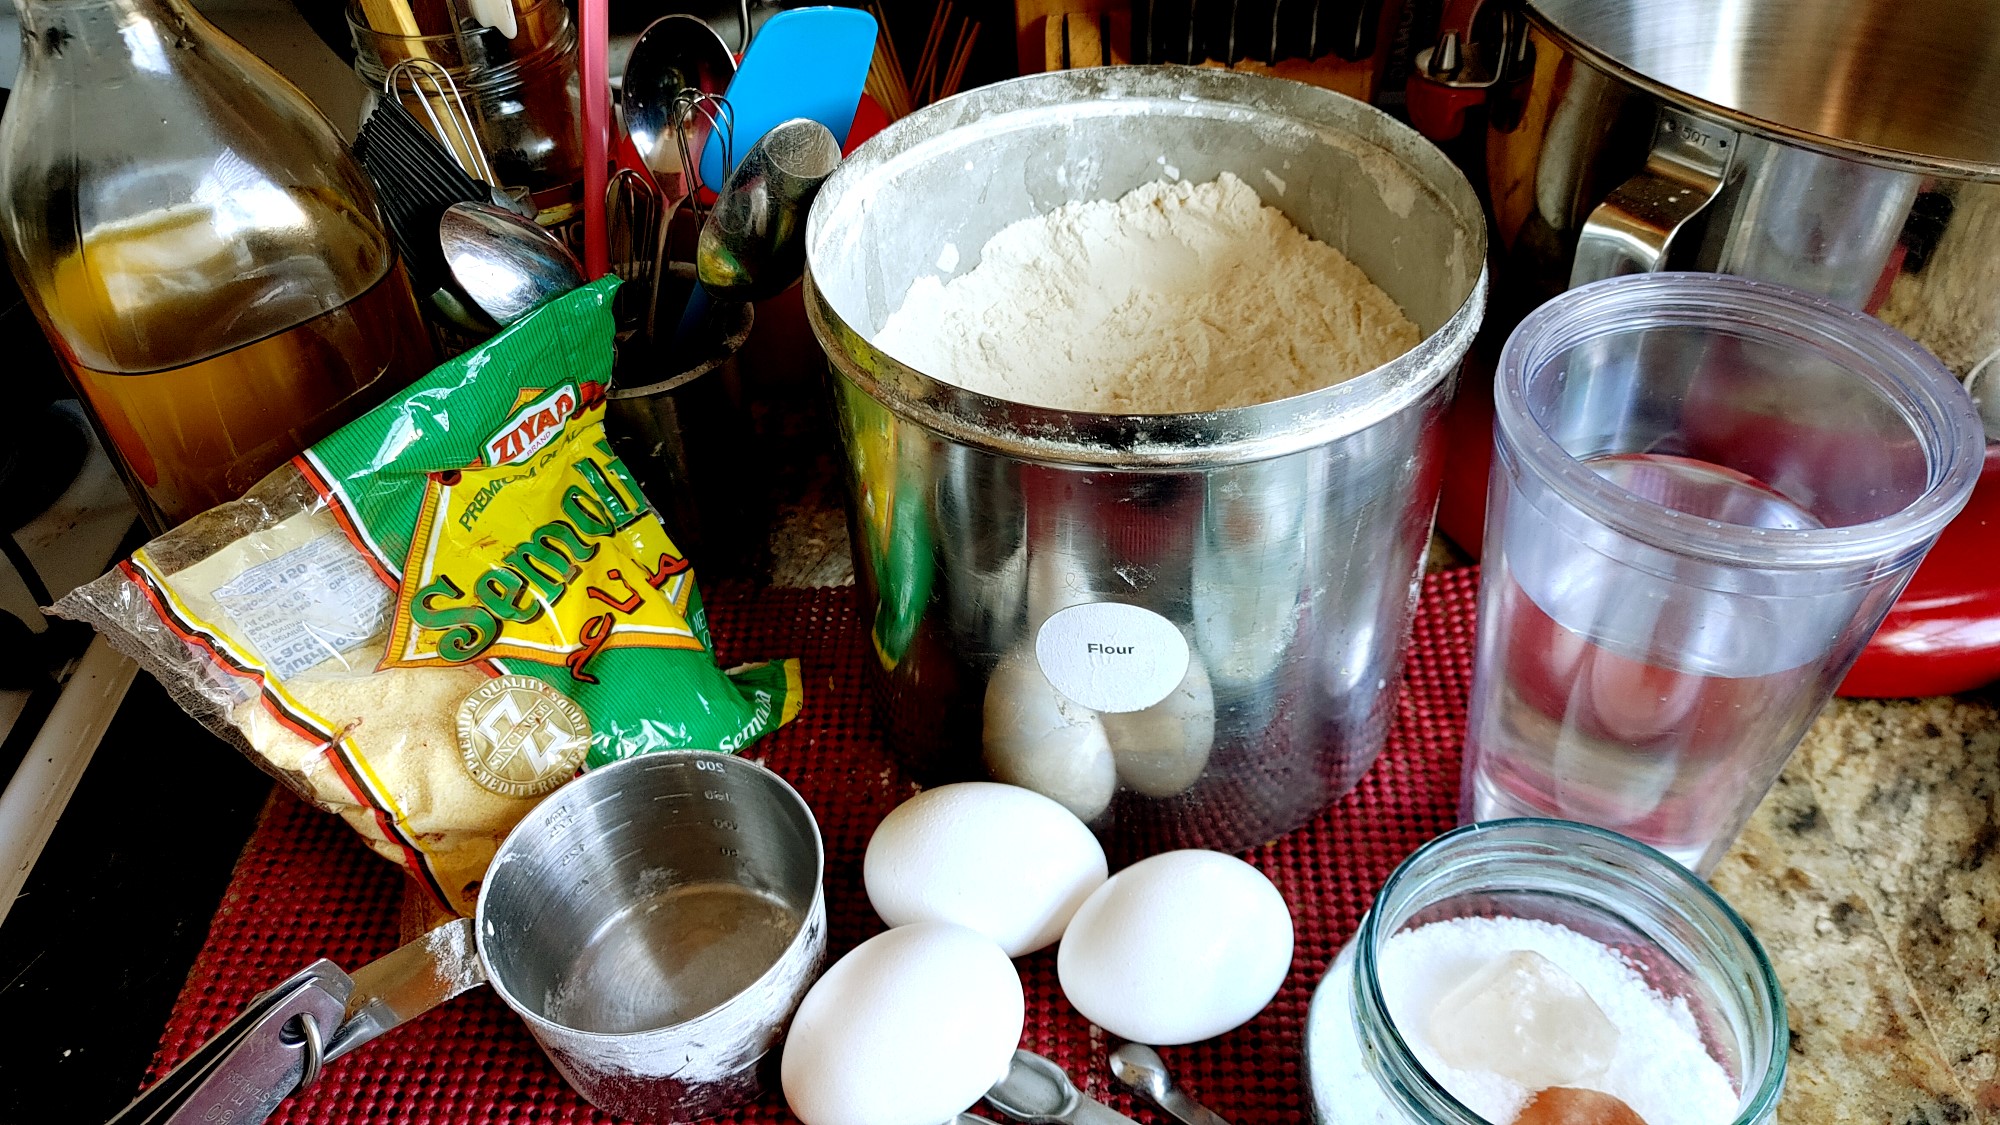
Ingredients
~~ For the Dough ~~
- 2 cup *all-purpose flour
- 1 cup *Semolina Flour
- ¼ teaspoon salt
- ¼ teaspoon *Olive oil
- 4 Eggs
- 2 tablespoons Water
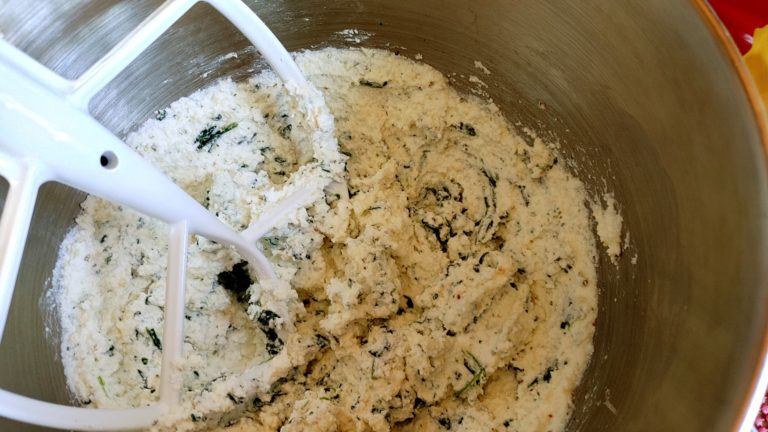
~~ For the Filling ~~
- 12 ounces ricotta
- ½ cup frozen spinach, defrosted
- 1 teaspoon Tuscan Sunset
- ¼ cup parmesan cheese
Instructions
To Make the Dough
- Mise en place
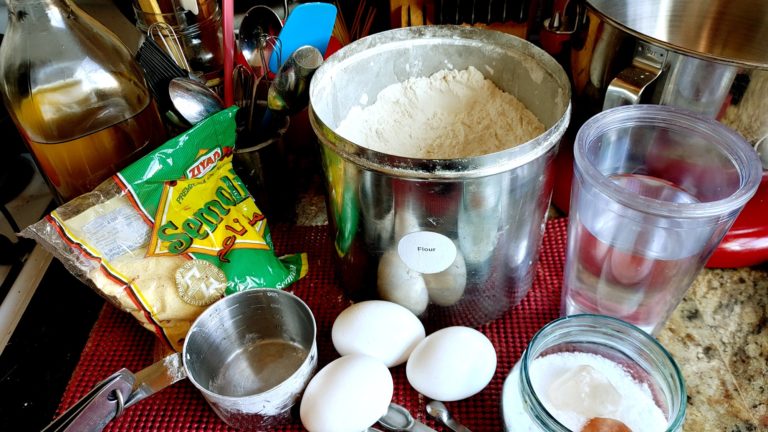
- 2 cup all-purpose flour, 1 cup Semolina Flour, 1/4 teaspoon salt, 1/4 teaspoon Olive oil, 4 Eggs, 2 tablespoons WaterPut flours and salt in the KitchenAid. Attach the dough hook, and add the eggs in the middle of the flours. Starting at slow, mix the flours and eggs together. Add the oil, and put some water into a glass. Slowly start adding a little bit of water at a time until the dough comes together in the bowl. Let the KitchenAid knead the dough on 2 for about 3-4 minutes.
-768x432.png)
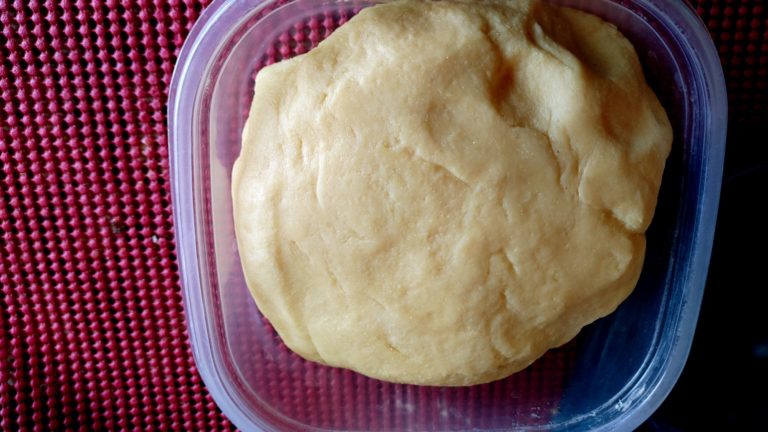
- You can tell when the dough is ready by using the Window Pane test. Stretch a little bit of the dough enough so you can see your finger on the other side.

- Turn off the machine and gather the dough on a floured board. Knead by hand, then put the dough into a plastic bag to rest for at least 30 minutes.
.png)


To Make the Filling
- Mise en place for filling
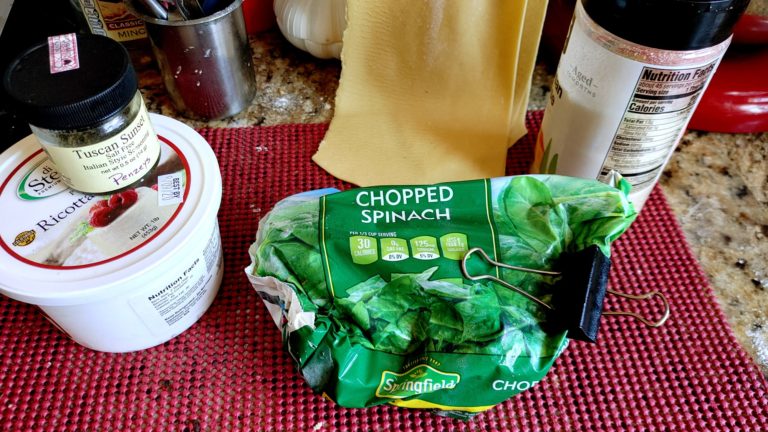
- 12 ounces ricotta, 1/2 cup frozen spinach, 1 teaspoon Tuscan Sunset, 1/4 cup parmesan cheeseCombine the ricotta, spinach, Tuscan Sunset, and cheese in the bowl of the cleaned out KitchenAid. Stir together and set aside.


To Roll Out the Dough
- Remove the dough from the plastic and cut it into four pieces.
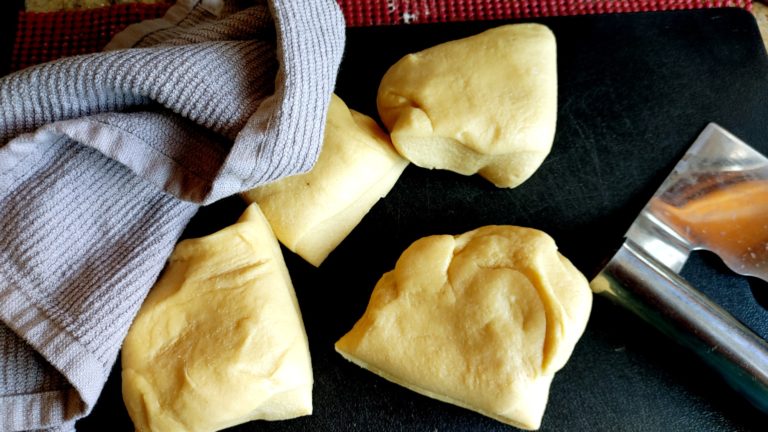
- Flour the pieces of dough. Working with one piece at a time, use a dish towel to keep the other pieces from drying out.
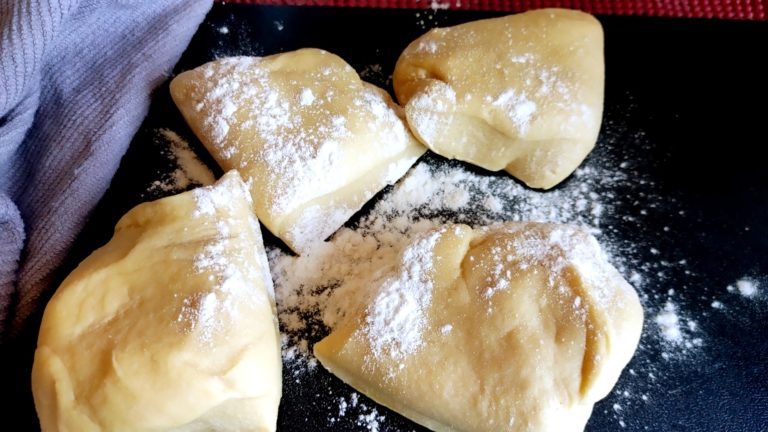
- Mold the dough into a rectangular shape and flatten it with your hand.
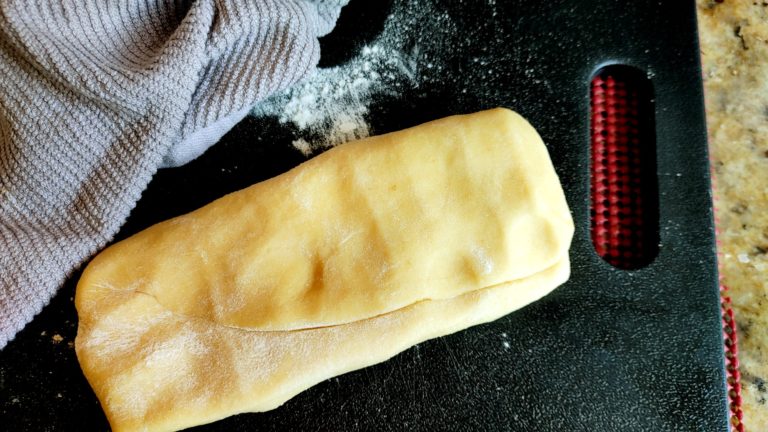
- Attach the roller to your KitchenAid or secure a roller to a surface.
- Turn the knob to 7, the widest setting. Run the dough through once then fold it and run it through again. Keep running and folding until the dough feels supple. Flour it a little bit and set the knob to 6 and roll and fold several times. Finally, set the knob at five and do the final roll and fold about 4 times. Set the pasta sheet aside, cover with wax paper, and continue doing the same with the other three pieces, covering each layer with waxed or parchment paper to prevent them from sticking.


To Make the Ravioli
- Fold a pasta sheet in half but don't let the sides tough. Make sure you fold it evenly.
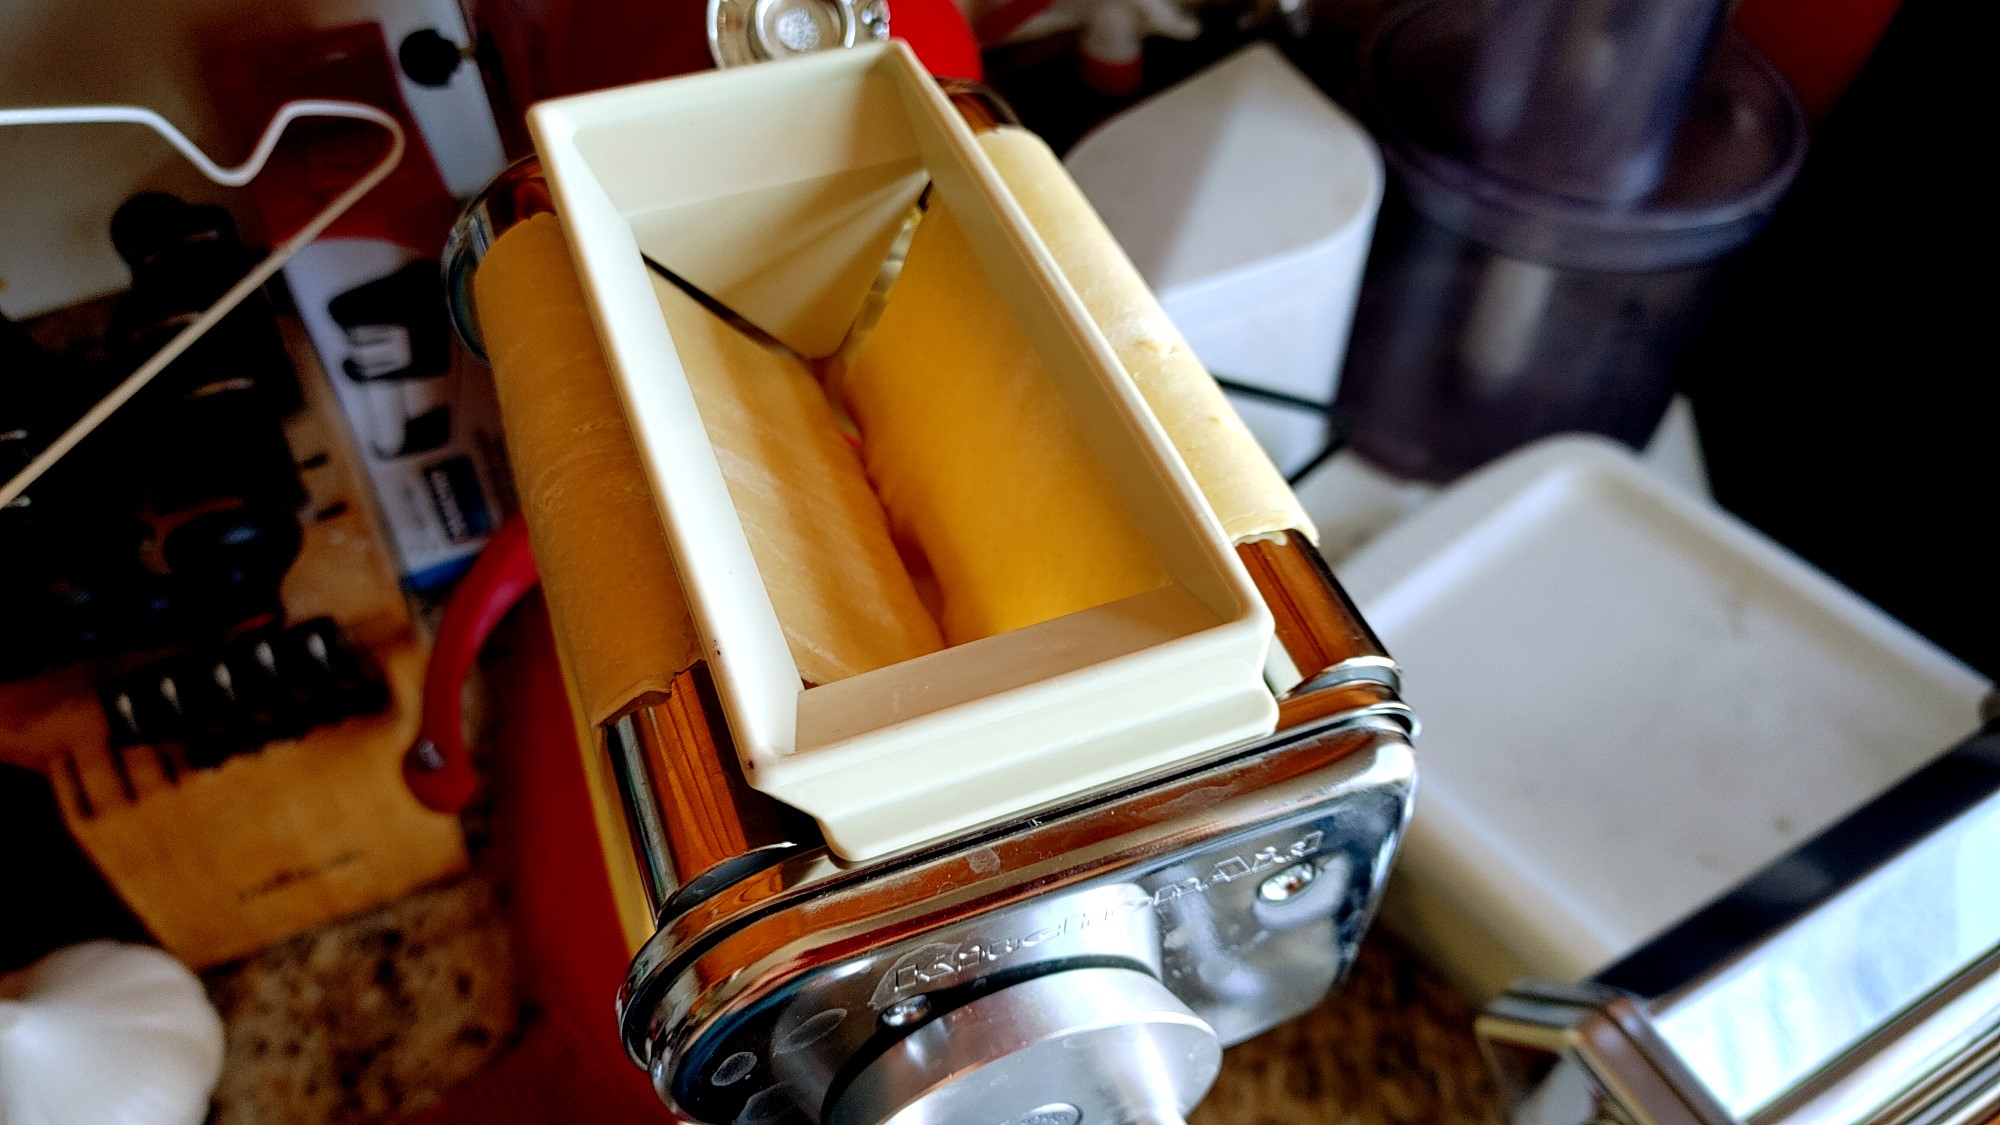
- If you are using the KitchenAid ravioli attachment, attach it to the KitchenAid. Have the hopper and spoon ready. take the folded bit and stick it between the two rollers. Roll it slightly to make sure the sheet is secure. Put the hopper in place and put two spoonfuls of the filling in the hopper. Turn the dial and continue to fill the hopper as needed. When all the dough has run through, remove it and set it aside, covering it with a towel while you run the rest of the dough and filling through.

- If you are doing this by hand, then lay the sheet on a table or other large, flat area. Spoon bits of filling onto half of the dough leaving about half an inch between each bit. Fold the other half over and press down with your fingers to make the little pockets.
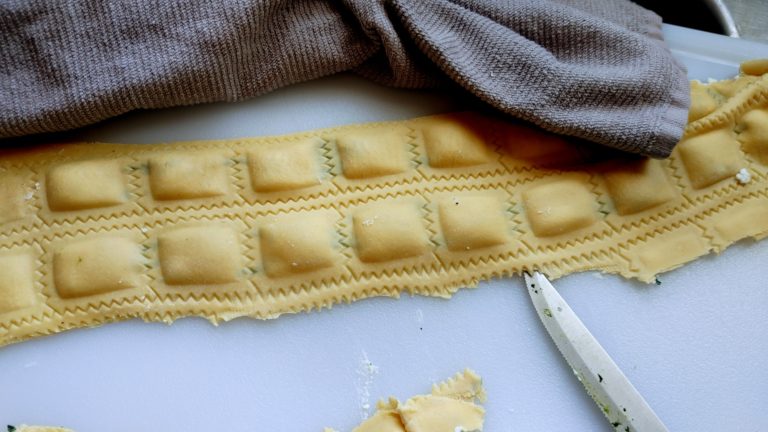
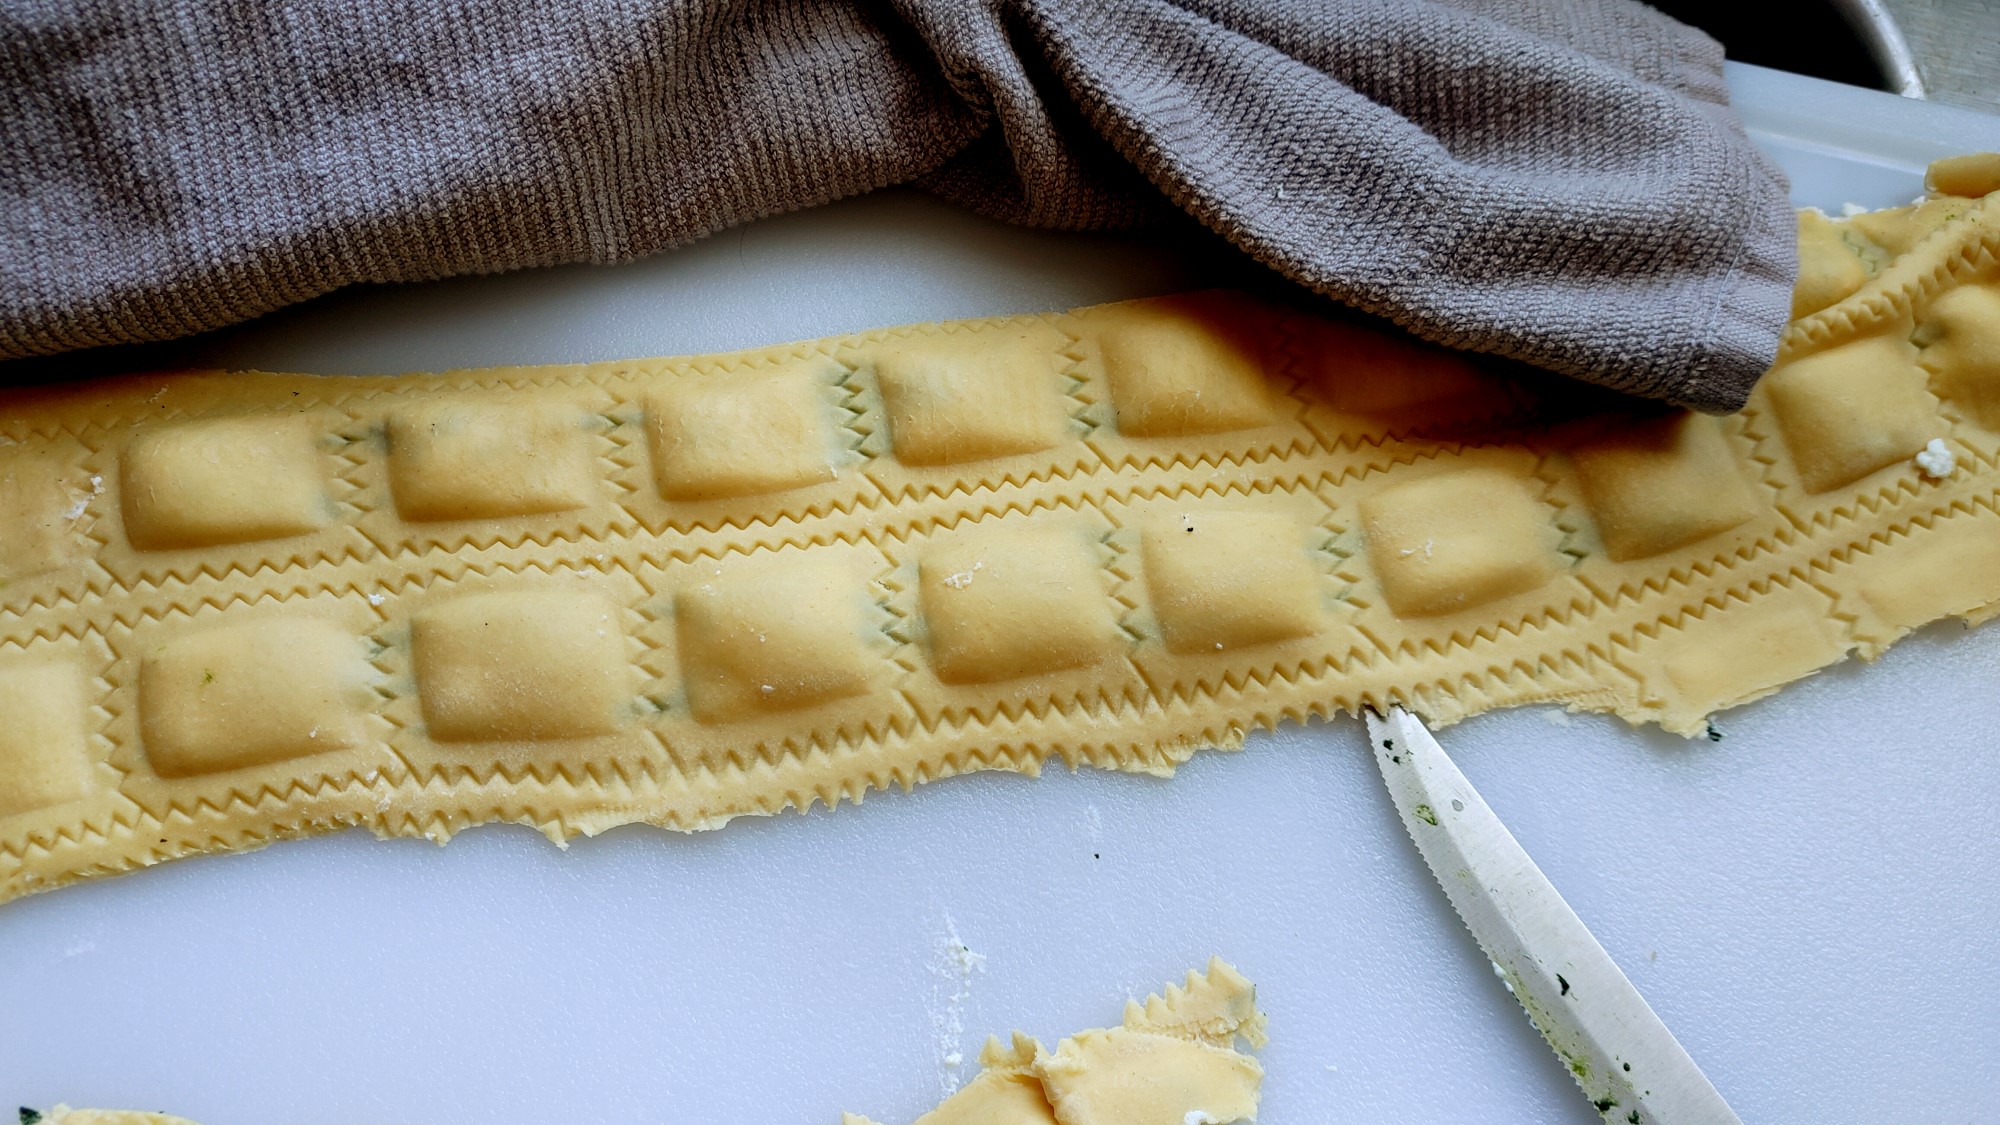
- When you are finished, use a pastry cutter to cut the squares. If the KitchenAid's pasta is not cooperating, use a pastry wheel to cut those squares as well.

Cooking the Ravioli
- You can cook the ravioli right away if you want by bringing a large amount of salted water to a boil and carefully laying the ravioli in the water. Let the ravioli cook until it floats to the surface then take it out using a spider spoon.
- If you don't want to cook it right away, you can put the ravioli in layers in a container.
- To freeze the ravioli, lay them out individually on a cutting board and put them in the freezer uncovered. When they are frozen solid, put them in a bag and vacuum seal them.

Comments are closed.