Summary
This recipe shows you how to make a perfectly fluffy bulgur pilaf using your Instant Pot. .The result is a flavorful, nutritious side dish that pairs beautifully with chicken, lamb, or anything with a good sauce.
What’s on Your Plate
Toast fine bulgur in butter with dried minced onion and bell pepper, add boiling hot water with chicken base, switch to Keep Warm for thirty minutes. No pressure cooking, no Burn notice. Done.
There are side dishes, and then there are side dishes that make you look like you actually know what you’re doing. Bulgur Pilaf in an Instant is firmly in the second category. It comes together faster than rice, tastes better than rice, and is better for you than rice. The Instant Pot makes it nearly impossible to get wrong, which is saying something, because the difference between perfect bulgur and a gummy mess is mostly a matter of technique and the right grind. Get those two things right and you will never go back to plain rice again.
Bulgur and the Art of the Pilaf
Bulgur wheat is one of the oldest processed foods in human history, with records of its use dating back thousands of years across the Middle East and Mediterranean. It is whole wheat that has been parboiled, dried, and cracked, which means the heavy lifting is done before it ever reaches your kitchen. That pre-cooking is precisely why bulgur cooks so fast.
There are four grades of bulgur, ranging from fine (#1) to extra coarse (#4). The grade matters more than most recipes acknowledge. Fine bulgur, which is what this recipe uses, behaves very differently from medium or coarse. It absorbs liquid quickly, cooks in a fraction of the time, and produces a lighter, more delicate texture. If you have made bulgur before and ended up with something disappointing, there is a good chance you used the wrong grade or followed a recipe written for a different one.
Beyond its versatility, bulgur is genuinely good for you. It is high in fiber, a solid source of plant-based protein, and has a lower glycemic index than white rice, making it a smart choice for anyone managing their blood sugar. It is also a good source of manganese, magnesium, and iron. All of that, and it tastes better than plain rice too.
The pilaf technique — toasting the grain in fat before adding liquid — is ancient and universal. You find versions of it from Turkey to India to the American South. The toasting step is not optional and it is not decorative. It creates a protective layer around each grain that keeps them separate during cooking, and it develops a nutty, roasted flavor that plain steamed grain simply cannot replicate. Do not skip it.
Why Bulgur Pilaf works
Three things make this recipe reliable every time.
First, the grind. Fine bulgur (#1) with a 1:1 liquid ratio is the correct combination for Instant Pot cooking. Medium bulgur requires more liquid and more time. Using the wrong grind with this method will give you either mush or crunch, neither of which is what you want.
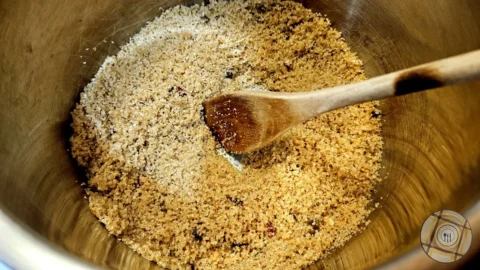
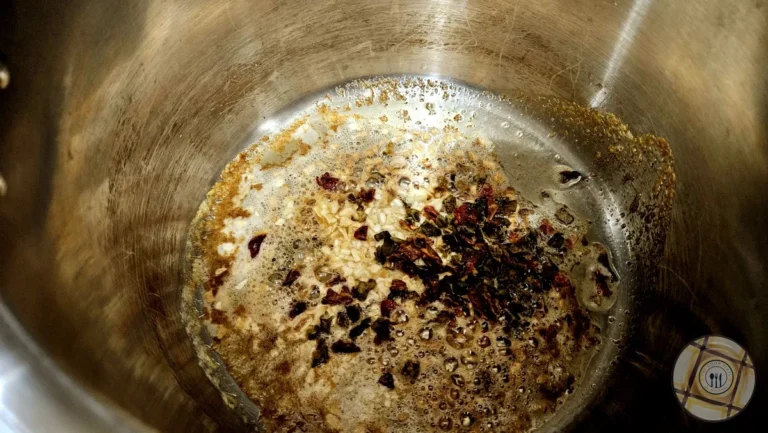
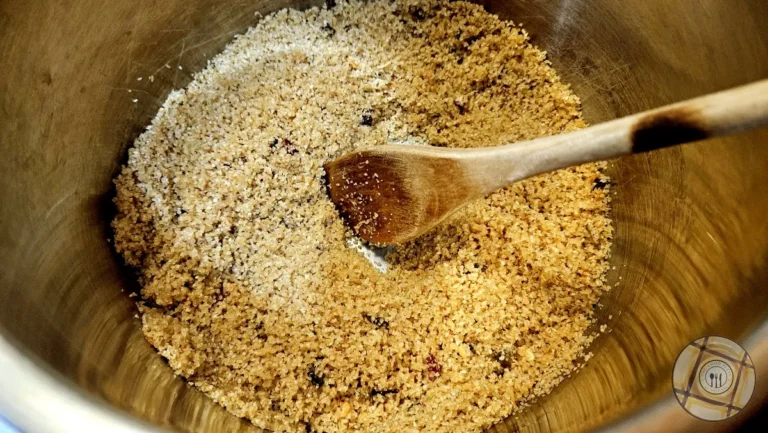
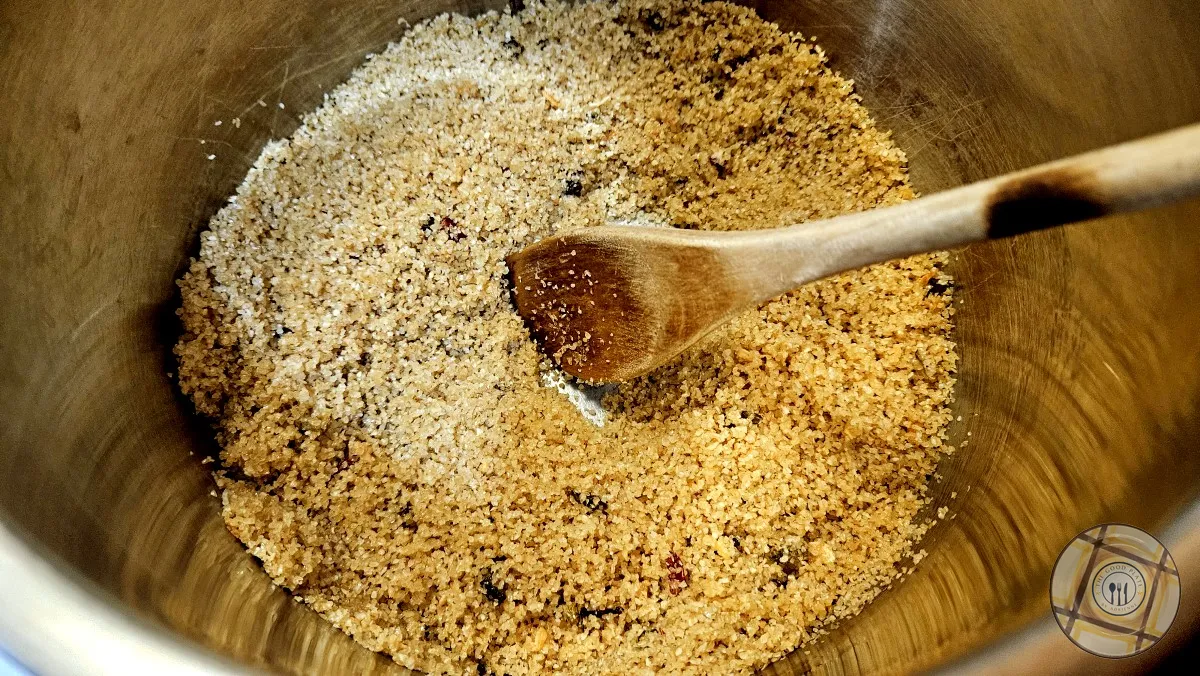
Second, the toast. Sautéing the aromatics in butter first, then adding the dry bulgur and letting it toast in that flavored fat, builds the foundation of the dish. You are looking for a golden color and a smell that makes you want to eat it immediately. That is the right moment to add the liquid.
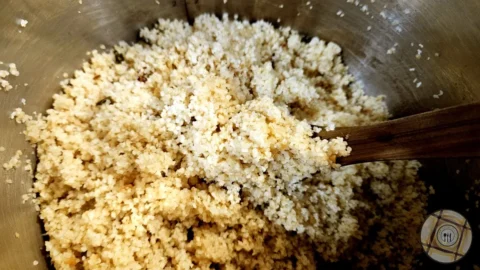
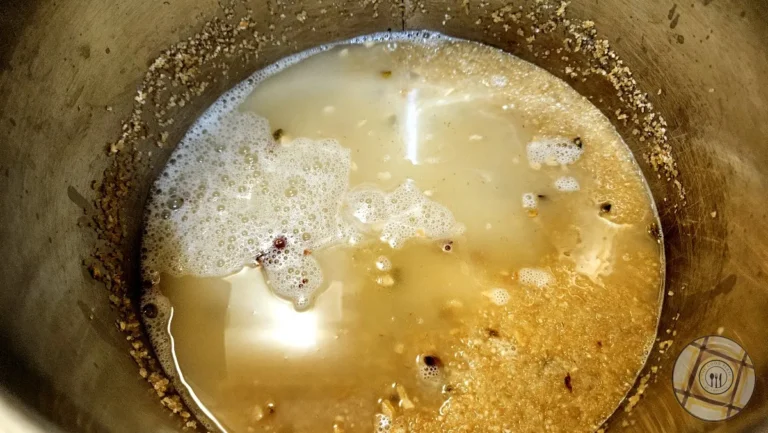
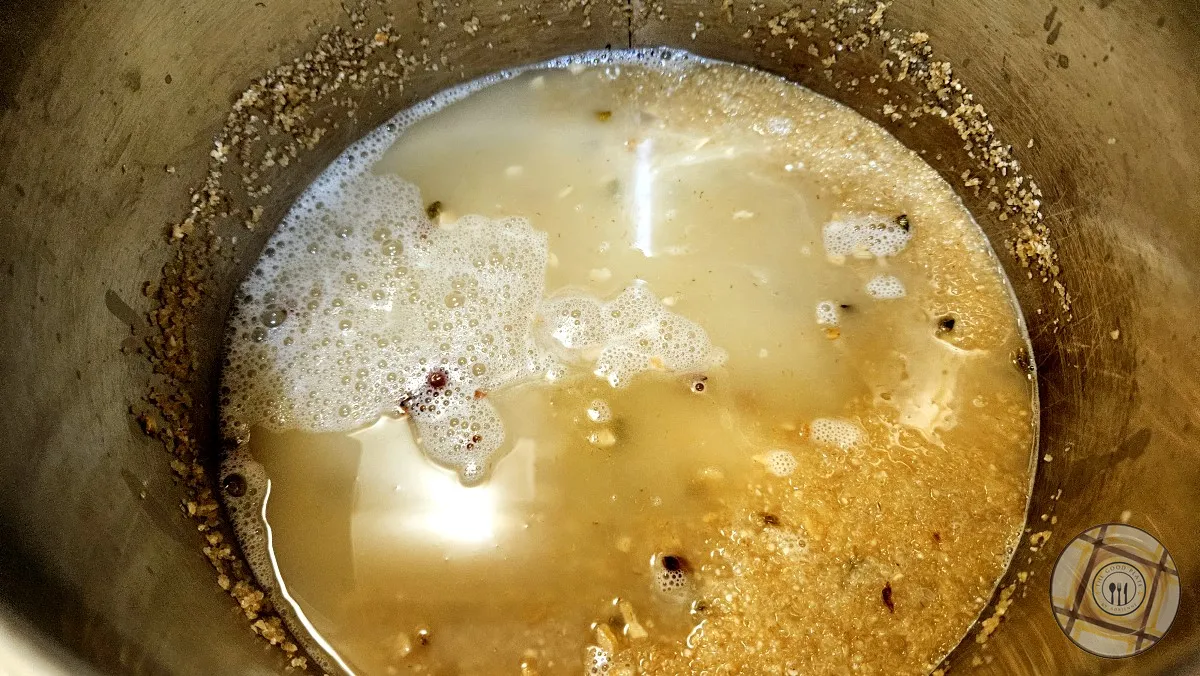
Third, the Keep Warm method. Adding boiling hot liquid to the toasted bulgur and switching the Instant Pot to Keep Warm for thirty minutes is the technique that makes this foolproof. No pressure cooking means no Burn notice, no babysitting, and no guesswork. The residual heat does all the work gently and evenly, giving you perfectly separate grains every time.
Common Mistakes and Gotchas
A list of common mistakes and Gotchas
- Use fine bulgur (#1), not medium or coarse. The cooking time and liquid ratio in this recipe are calibrated for fine. Other grinds will not work correctly here.
- Do not skip the toasting step. It is the difference between pilaf and porridge.
- Do not add extra liquid. A 1:1 ratio is correct for fine bulgur in the Instant Pot. More liquid means mush.
- Do not add room temperature liquid. The liquid must be boiling hot when it goes in. That heat is what activates the Keep Warm method correctly.
- Do not lift the lid early. Thirty minutes on Keep Warm is the formula. Trust it.
Serving and Storage
Serving
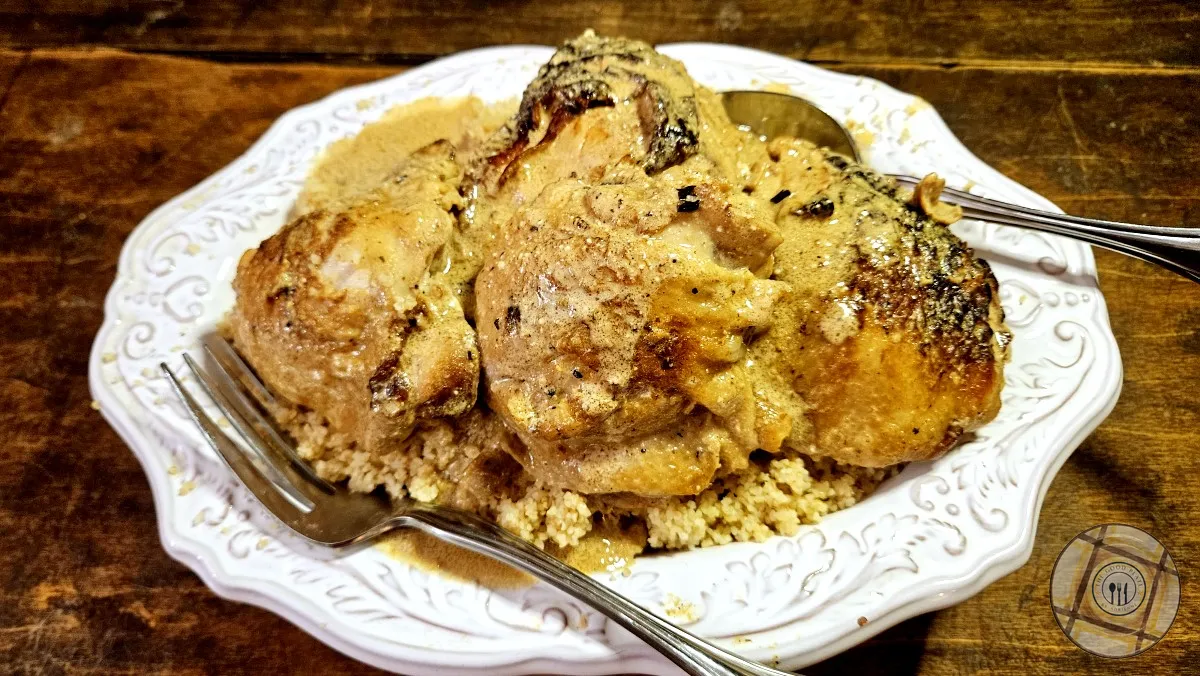
Bulgur pilaf is one of the most versatile sides in your repertoire. It is wonderful alongside roasted chicken — try it with our Lemon Garlic Chicken — or lamb chops. It is also excellent as a base for anything saucy, since the fine texture soaks up pan drippings and gravies beautifully. For a complete table, pair it with a simple yogurt salad and you have a meal that needs nothing else.
Storing
Leftover bulgur pilaf keeps well in an airtight container in the refrigerator for up to four days. Reheat with a splash of water or broth to restore moisture, either in the microwave or in a covered pan over low heat. It also freezes well for up to three months. Portion it before freezing for easy weeknight use.
FAQ
Can I use broth instead of water and chicken base?
Yes. If you have good chicken stock on hand, use it. The flavor will be slightly richer. Just make sure it is unsalted or low sodium, since chicken base already contributes salt.
Can I make this vegetarian?
Easily. Substitute vegetable broth or water with vegetable base for the chicken base. The technique is identical.
Can I use medium or coarse bulgur?
Not with this recipe as written. Medium bulgur needs a higher liquid ratio and more time.
Why is my bulgur mushy?
Either too much liquid, the wrong grind, or your liquid was not hot enough when you added it. Fine bulgur at 1:1 with boiling hot liquid and thirty minutes on Keep Warm produces separate, fluffy grains every time.
Can I double the recipe?
Yes. The ratio and timing stay the same. Just make sure you do not exceed the half-fill line on your Instant Pot liner.
Step by Step Photos

Bulgar Pilaf in the Instant Pot Recipe
Email Me the Recipe
Enter your email address and we will send it straight to your inbox.
Bulgur Pilaf in an Instant: 1-Minute Instant Pot Recipe
Tips from the Chef

Equipment

If you purchase any of the products through these affiliate links, I get a few pennies that help keep The Good Plate open. I use these products myself and want you to be able to easily find them.
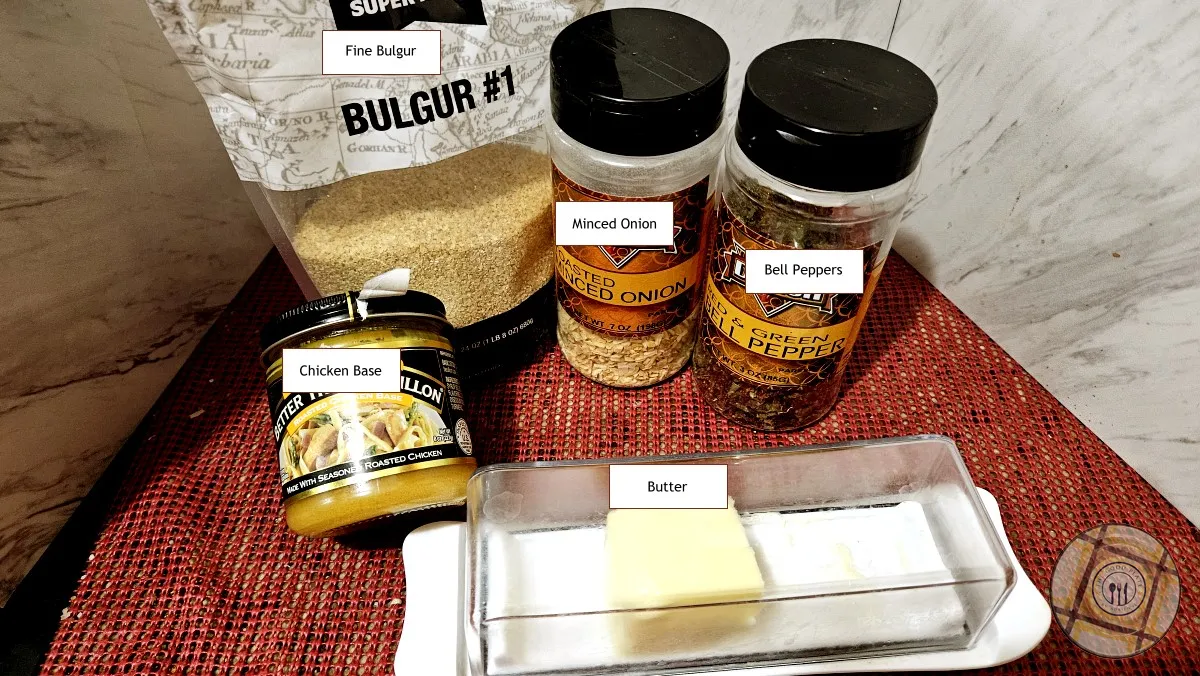
Ingredients
- 1 teaspoon butter
- 1 tablespoon dried onion
- 2 tablespoons dried bell pepper
- 2 cups boiling water, or chicken broth, boiling hot
- 2 teaspoons *chicken base, omit if using your own broth
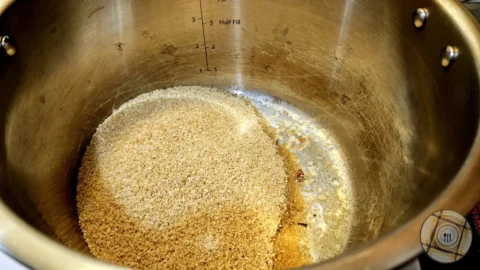
- 2 cups fine bulgur
Instructions
- Gather ingredients

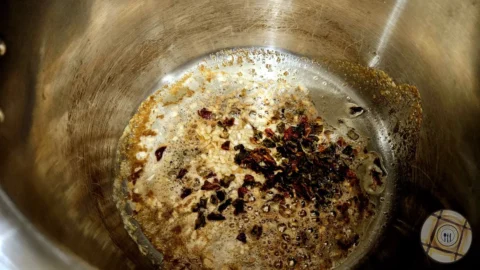
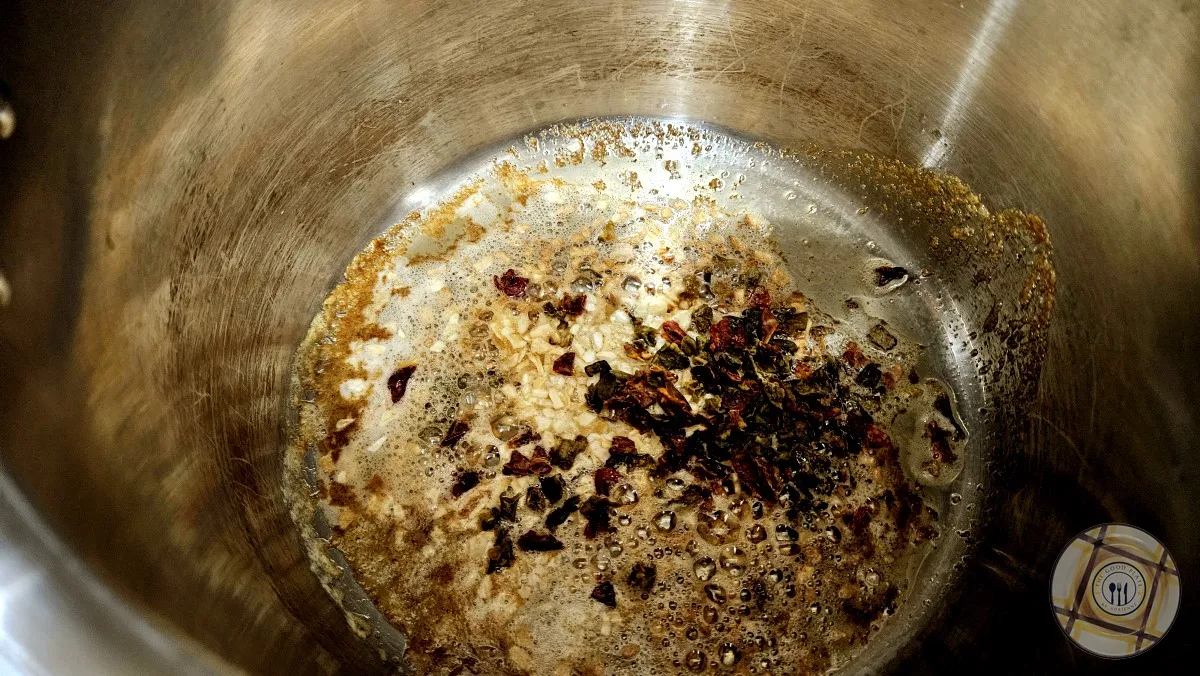
- 1 teaspoon butterSet the Instant Pot to saute and add the butter.
- 1 tablespoon dried onion, 2 tablespoons dried bell pepperAdd the onion and bell pepper and saute in the oil.
- 2 cups boiling water, 2 teaspoons chicken baseMix the water and chicken base together. If you are using your own broth, bring it to a boil.
- 2 cups fine bulgurAdd the bulgur and saute it as well until it has started to brown.
- Turn off saute mode and add the hot broth to the pot.
- Cover and seal the pot. Turn the pot to Keep Warm for 30 minutes.
- Remove the top of the Instant Pot.

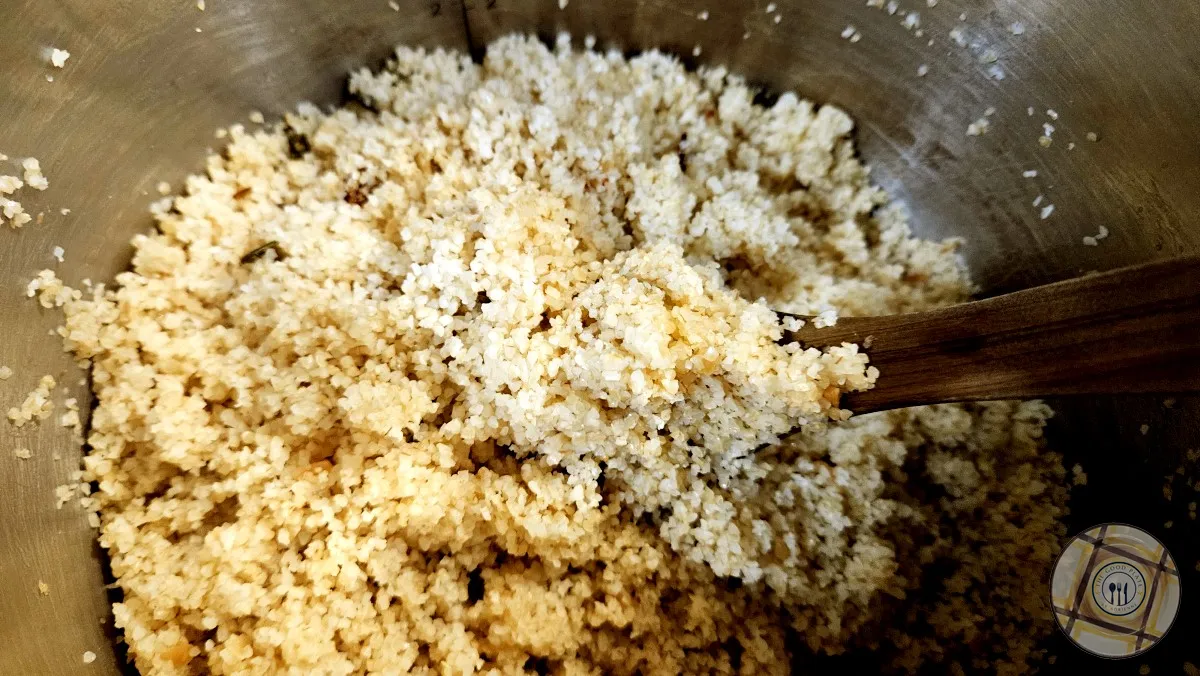
- Fluff the bulgur

- Serve


Video
Nutrition
Transcript of Bulgar Pilaf in the Instant Pot
Transcript
Good afternoon, and welcome to the Good Plate’s Kitchen.
Today, we’re making bulgur pilaf in an instant.
A fast, full-proof side dish that comes
together in just one minute of pressure cooking.
Bulgur wheat has been a staple of Middle East and
a Mediterranean cooking for thousands of years.
It’s whole wheat that’s been parboiled, dried, and cracked, which means most of
the cooking is already done before it even reaches your pot.
It’s high in fiber, a good source of plant-based protein, and has a lower
glycemic index than white rice, making it a
smart choice for anyone watching their blood sugar.
Let’s talk about what you need.
Fine bulgur, that would be number one grade, butter,
chicken base, dried minced onion, and dried bell pepper. That’s it.
The key to a great peel-off is toasting.
We start by sauteing our aromatics and butter right in the instant pot.
That’s some minced onion and bell pepper
getting fragrant and just starting to color.
Then we add the dry bulgur and stir it into the butter.
You’re looking for a golden nutty color and a toasty smell.
That step is what separates pilaf from plain cooked grain.
Once the bulgur is toasted, we add our liquid, water with chicken base,
or if you have chicken stock on hand, feel free to use
it, and give everything one good stir to deglaze the pot.
Then we seal it up one minute on high pressure.
And let it do a 10 minute natural release. That’s it.
Open the lid and look at that.
Every grain is separate and fluffy and packed with flavor.
A quick fluff with a wooden spoon and it’s ready to serve.
Bulgur Pilaf is one of the most versatile sides in your repertoire.
It’s wonderful alongside roasted chicken, lamb, or just
throughout anything with a good sauce to soak into it.
Thanks for watching.
See you next time on The Good Plate.
And remember… forever forward.
Forever flavorful. Yum yum!