I got inspiration from my friend Shem Walker, of Kobelin By Shem, who does amazing things with Swarovski crystals. Talk about Bling, and you talk about Shem. If only I were as talented as she is. I was also inspired by pictures I saw of decorated pumpkins in Pinterest, including on black one with lots of jewels. But, I wanted my pumpkin to be different.
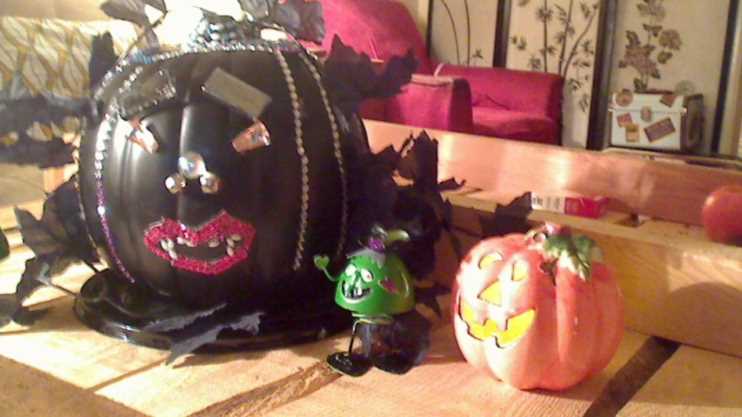
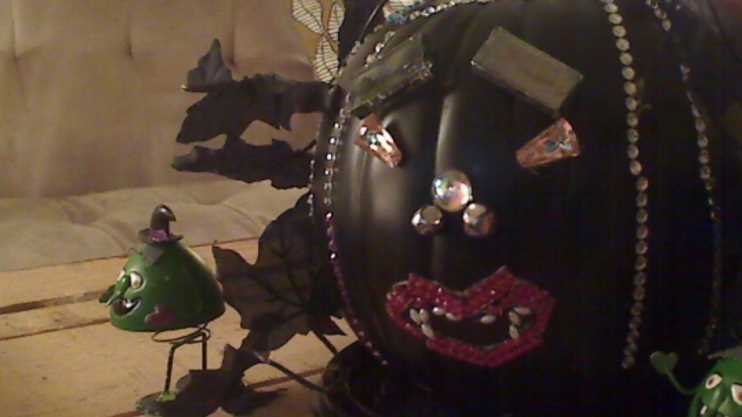
When I was a teenager, my friends and I went to see the live production of The Rocky Horror Show at the Roxy Theater in West Hollywood. I even dressed up as Frankenfurter in my senior year in high school. A red-lipped vampire pumpkin was the only way to go.
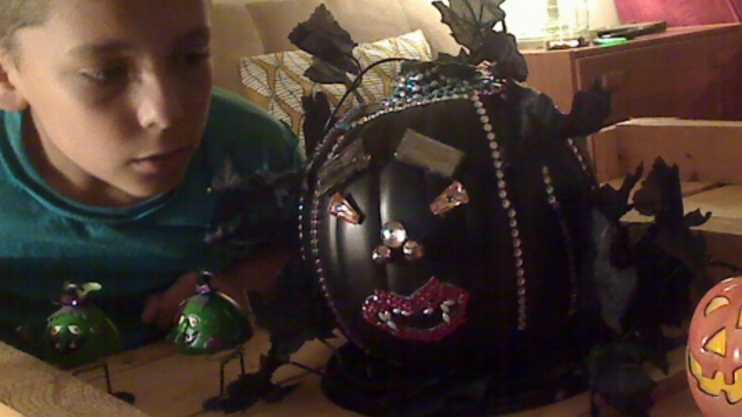
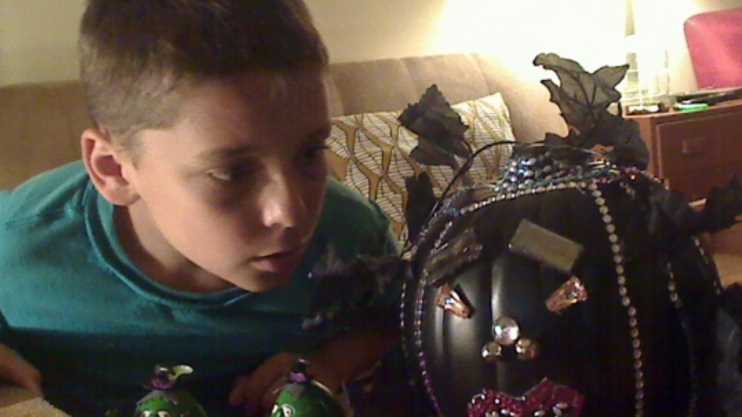
Spane’s school has a pumpkin contest every year, for those students who want to pay the school money to be in the contest. It’s not real money, it’s the school’s money that they print with a picture of the school’s namesake on it. But even so, Spane is just too frugal to spend his hard-earned money on contests, he prefers useful things like pencils, pencil sharpeners, notebooks, etc. It’s a good thing, too, because, with all the other stuff I have had to get done, the pumpkin sat unadorned until tonight. The pumpkin found itself in the pictures of our Halloween costumes, Spane’s Tarantula costume, and my Well Dressed Black Cat costume. I wanted to serve my Mocha Fudge Pie with a completed pumpkin.
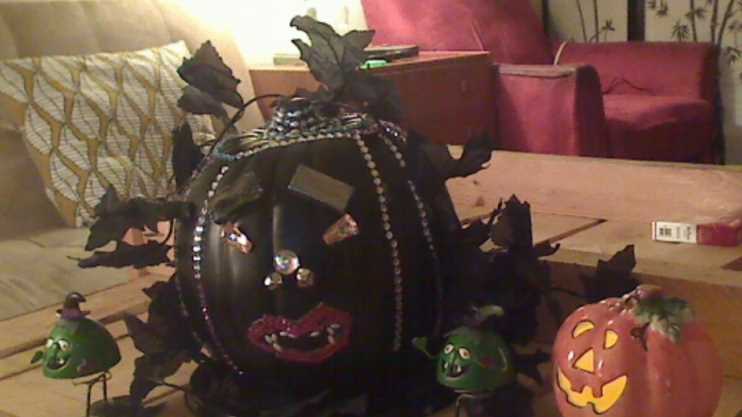
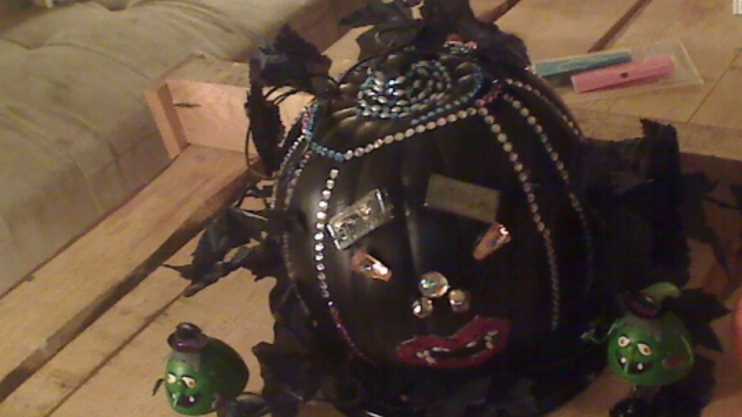
We got the black pumpkin at our local Michael’s, and jewels from Michael’s and the local Dollar King. I also had some bells and glass tiles from Spane’s 4th grade California Mission project. I used chalk to outline where I wanted to place everything, and hot glued anything that did not already have glue. Then I used black leaves from the dollar store as “hair” for my vampire pumpkin.
The pumpkin has an honored place on the coffee table, with a ceramic pumpkin, and two little Halloween things I also got at the dollar store. I think our tablescape looks pretty darned good!
Email Me the Recipe
Enter your email address and we will send it straight to your inbox.
Jeweled Vampire Pumpkin for Halloween
Equipment

Supplies
- 1 black crafting pumpkin
- craft rhinestones preferably in strips
- craft button for the nose
- craft bells for the nostrils
- craft rubies for the lips
- craft pearls for the teeth
- craft black fall leaves for decoration
Instructions
- Use the chalk to outline where you want your decorations to go.
- Make the mouth first, as this is the most difficult, and most intricate. Use the rubies for the lips, pearls for teeth. It's best to use oval pearls to make the fangs.
- Hot glue the larger pieces, the eyes, nose, and eyebrows.
- Put rhinestone strips in the ribs of the pumpkin. You should count about how many ribs the pumpkin has so you know how many strips you need. You may also want to hot glue the rhinestones on so they will last longer.
- Put more rhinestones and pearls on the pumpkin's stem.
- Artfully arrange the leaves around the sides of the pumpkin, then hot glue to tack them in place.
- Place a pumpkin on a bed of more black autumn leaves, and you're done!