Sushi Oshizushi is a wonderful and easy way of making sushi. Rolling sushi can feel intimidating. If you’ve ever tried with a bamboo mat, you know the frustration: rice sticking everywhere, fillings falling out, and rolls that don’t look like the restaurant versions. That’s where a traditional wooden oshizushi mold comes in. With this simple tool, you can make neat, pressed sushi squares that look elegant, taste wonderful, and don’t require any rolling skills.
I love sushi, and I so admire the sushi chefs who make it. It is expensive because not only are you paying to high quality sushi-grade fish, you are also paying for the expertise of the person making it. I decided that I was going to try making it at home. I had the rice ready, the nori, and filling, and what a disaster it was! The filling fell out, the nori didn’t roll properly, it fell apart all over my lap! I gave up until I saw the wooden mold. I was surprised at how easy it was and how delicious! Because it was my first time making sushi oshizushi, some of my layers didn’t line up as well as they could have, but next time, it will be an award-winning effort!
Today, I’ll walk you through the history of oshizushi, how to prepare the wooden mold, the right rice and seasonings to use, and ideas for fillings — including how to turn this into a California roll-style pressed sushi with leftover surimi from our ceviche recipe

A Little History: Oshizushi and the Hiba Wood Mold
Oshizushi (押し寿司) literally means “pressed sushi.” It originated in the Kansai region of Japan, particularly in Osaka, more than 400 years ago. Long before refrigeration, pressing fish and rice together made it easier to transport and slowed spoilage. This form of sushi remains popular today, especially at festivals, because of its beautiful, uniform shape and convenient portioning.
The molds are often made from Japanese Hiba wood, known for its soothing natural aroma and natural antibacterial properties. According to Japanese woodworking tradition, Hiba is valued not just for durability but also for helping preserve food safely. The wood will smell faintly herbal when new, which isn’t a chemical odor but the natural fragrance of the tree itself.
Why Oshizushi Works
Pressed sushi works so well because the pressure compacts the rice and fillings evenly. Instead of relying on tight rolling (which takes practice), the mold does the work for you. This makes it perfect for beginners, but also fun for experienced cooks who want to try something traditional and beautiful.
Unlike most rolls, it can be made in advance and sliced just before serving. It is ideal for parties or bento boxes.
Five Steps to Making Sushi Oshizushi at Home
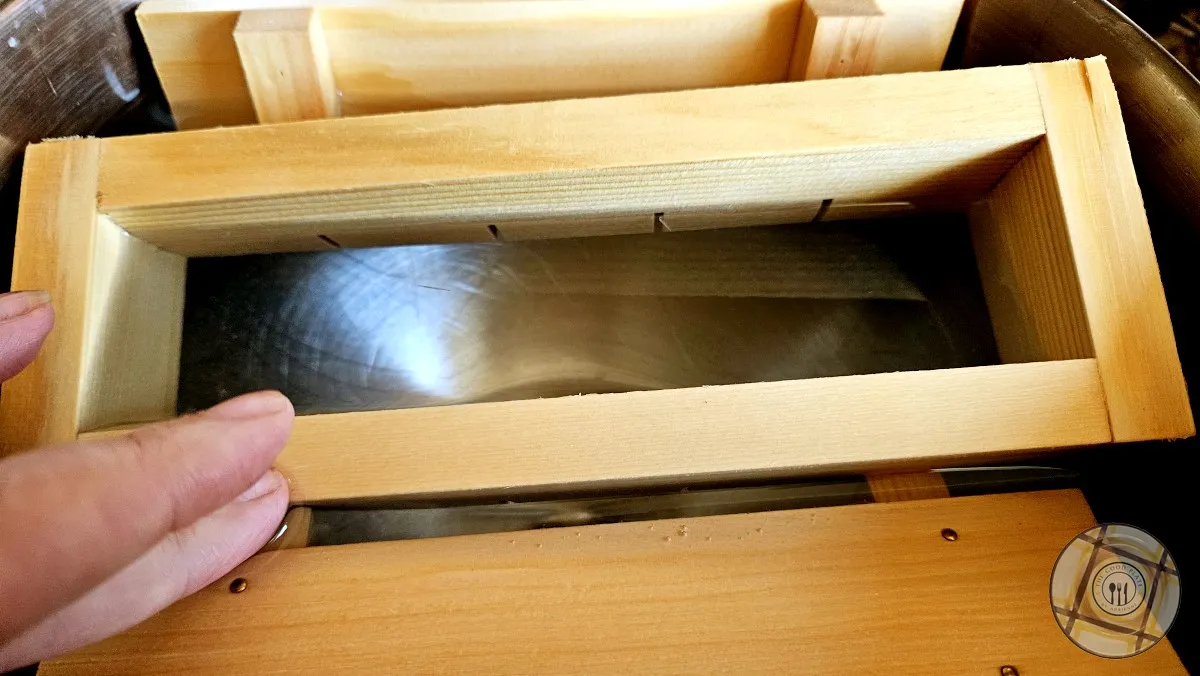
Step 1: Preparing the Wooden Mold
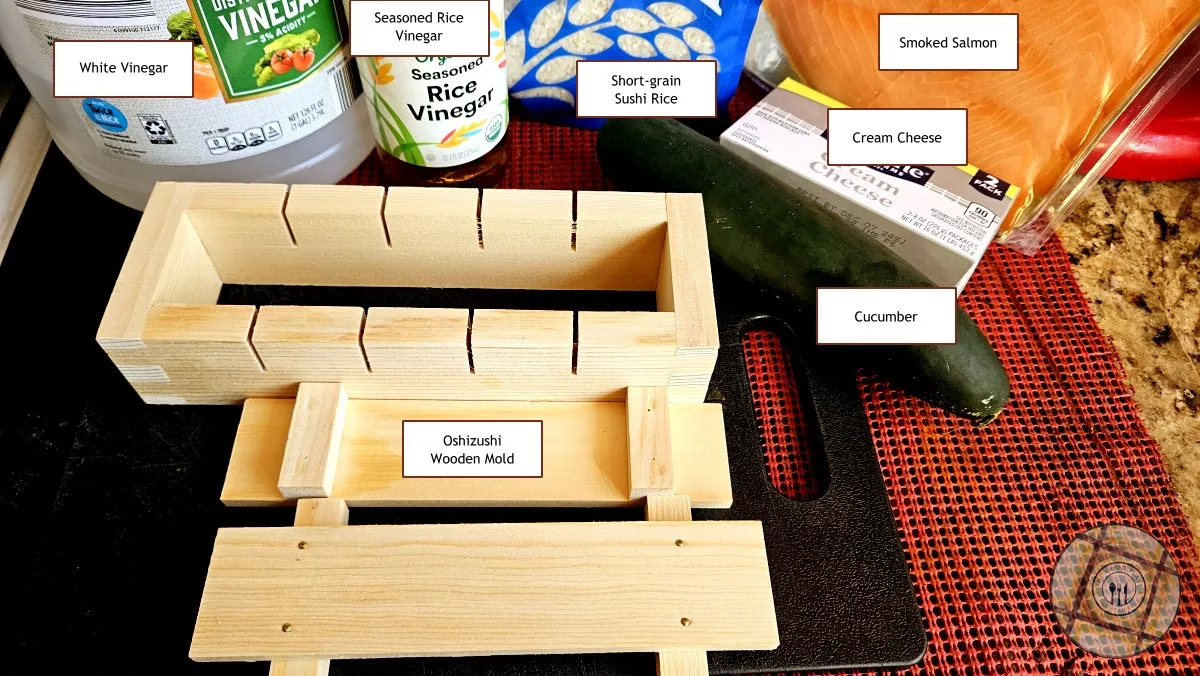
Before first use, soak the mold in a bowl of water mixed with a little white vinegar for about two hours. This helps the wood expand, reduces sticking, and brings out those antibacterial properties. After soaking, rinse and let it dry. Do not dry it in the sun or near heat. Drying the mold in the sun can warp the wood.
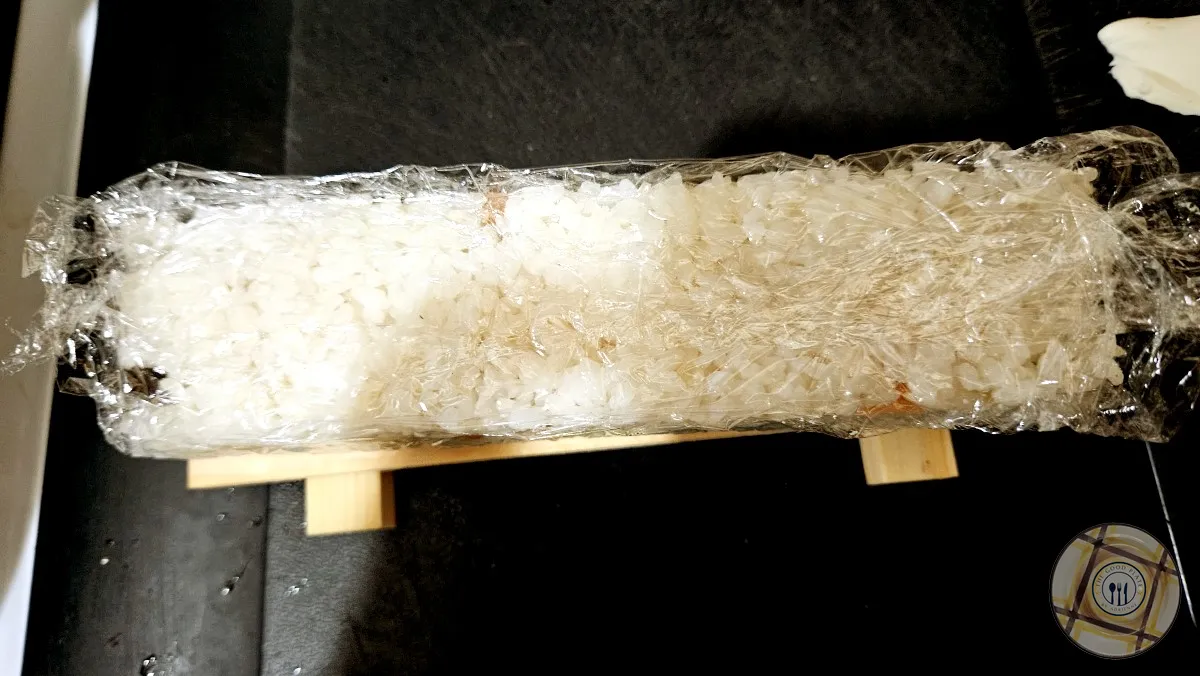
When you’re ready to use it, line the inside with plastic wrap. This isn’t cheating — it ensures the rice won’t cling and makes unmolding a breeze.
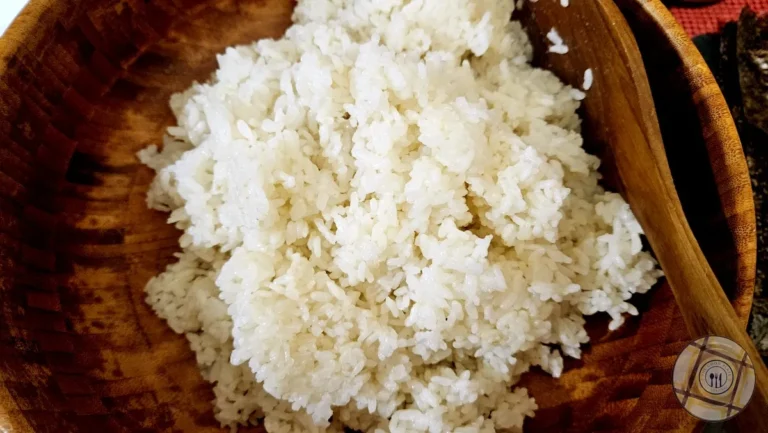
Step 2: Making the Right Rice
The foundation of sushi is the rice — and not just any rice will do. You need short-grain Japanese rice (sometimes labeled “sushi rice”). This rice has the right balance of starch to stick together without becoming mushy.
- Rinse the rice thoroughly under cold running water until it runs clear. This removes excess surface starch that would otherwise make the rice gluey.
- Cook the rice — I use my Instant Pot because it gives consistent results. On the stovetop, bring to a boil, then cover and steam gently until tender.
- Season the rice. Sushi rice isn’t plain. It is flavored with a mixture of rice vinegar, sugar, and salt. This seasoned vinegar balances the richness of the fillings and gives it its signature flavor.
Food safety tip: Always cool rice in the refrigerator, not on the counter. Cooked rice can grow Bacillus cereus bacteria quickly at room temperature. Chilling it promptly keeps it safe to eat (USDA Food Safety).
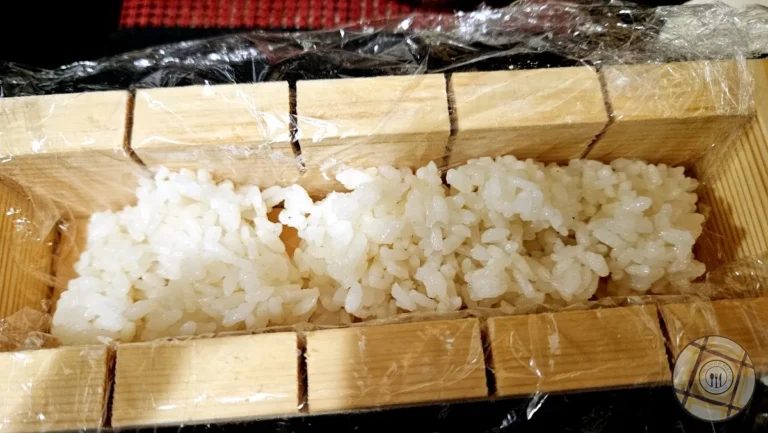
Step 3: Building the Layers
Now the fun part — assembling!
- First make sure all the fillings are cut into small pieces.
- Place a thin layer of rice into the mold and press gently.
- Add your fillings in neat layers.
- Top with another layer of rice, fold over the plastic wrap, and press firmly with the mold lid.
- Remove, unwrap, and slice along the guide marks for perfect pieces.
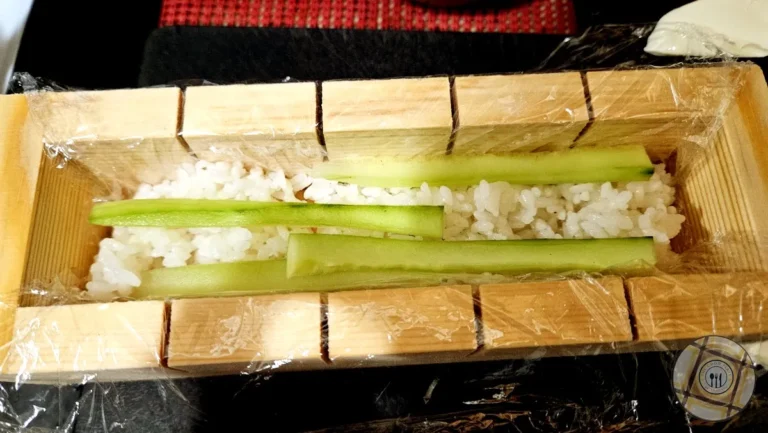
Step 4: Choosing Your Fillings
This is where creativity shines. Here are some ideas:
- Classic fillings: cucumber, avocado, cream cheese, smoked trout or salmon.
- Vegetarian options: roasted red pepper, marinated shiitake mushrooms, pickled daikon.
- California roll style: crab sticks (or better yet, extra surimi from our ceviche recipe), avocado, and cucumber. Add a sprinkle of sesame seeds for the finishing touch.
- Fusion ideas: cooked shrimp with spicy mayo, or teriyaki chicken with scallions.
Because everything is pressed, even softer or chunkier fillings stay put — no more falling-apart sushi rolls.
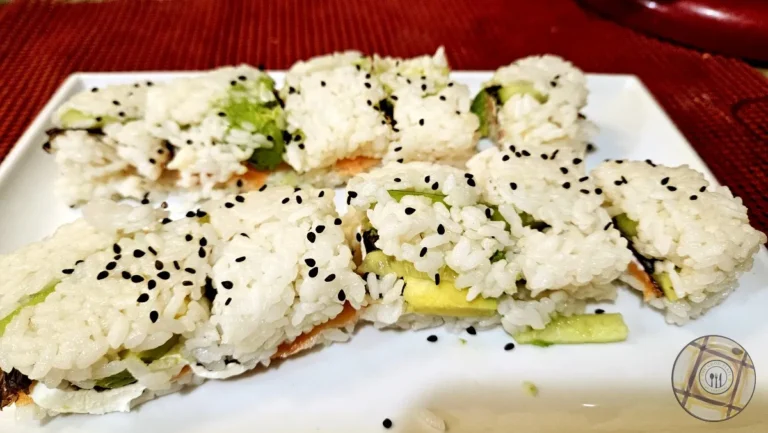
Step 5: Slice and Serve
Once pressed, lift the lid, remove the block of sushi, and cut along the guide grooves. The result: clean, uniform rectangles or squares of sushi that look like you bought them at a restaurant. Garnish with black sesame seeds, serve with soy sauce, wasabi, and pickled ginger, and enjoy.
Usage and Care of your Oshizushi
- Hand wash ONLY along the grain of the wood with water and a soft sponge
- Dry in shaded area before storing (rapid heat due to dish dryer or direct sunlight etc. will cause deformation)
- Because it is made of cypress, there may be some residual residue (this is hygienic and contains antimicrobial components). If you are concerned, you may wipe it off with vinegar diluted in hot water,
- Avoid soaking in water
- Avoid extended exposure to direct sunlight; it may discolor and/or warp
- Avoid using near exposed flame or electric stoves; wood is flammable
- NOT dishwasher safe
Final Thoughts
Sushi doesn’t have to be complicated or frustrating. With a simple wooden mold, you can make pressed sushi at home that’s neat, delicious, and full of flavor. Whether you keep it traditional with smoked fish and cucumber, or give it a California twist with surimi and avocado, oshizushi is a dish worth adding to your repertoire.
Email Me the Recipe
Enter your email address and we will send it straight to your inbox.
Sushi Oshizushi
Equipment

If you purchase any of the products through these affiliate links, I get a few pennies that help keep The Good Plate open. I use these products myself and want you to be able to easily find them.
Ingredients
~~ Mold ~~
- 2 quarts water
- 1 tablespoon white vinegar
~~ Rice ~~
- 2 cups sushi rice
- 2 cups water
- ¼ cup seasoned rice vinegar
~~ Sushi ~~
- 1 cucumber, small cut into matchsticks
- 1 avocado, small cut into matchsticks
- 2 sheets nori
- 4 ounces smoked salmon
- 4 ounces cream cheese, cut into matchsticks
- 1 teaspoon Sesame seeds, black for garnish
Instructions
- Mise en Place

Mold
- 2 quarts water, 1 tablespoon white vinegarPut the water into a large bowl with the vinegar. Put the mold into the water, submerged, for two hours. Remove the mold from the water and let it dry in a cool spot away from the sun. Drying it in the sun or near heat can warp the wood.

Rice
- 2 cups sushi rice, 2 cups water, 1/4 cup seasoned rice vinegarRinse the rice under cold water until it runs clear. Put the rice and water in the Instant Pot and set it to 6 minutes on high, using slow release. When the rice is done, put it in a large bowl and add the rice vinegar. Fluff the rice and incorporate the vinegar. Put the rice in the refrigerator to cool.

Sushi
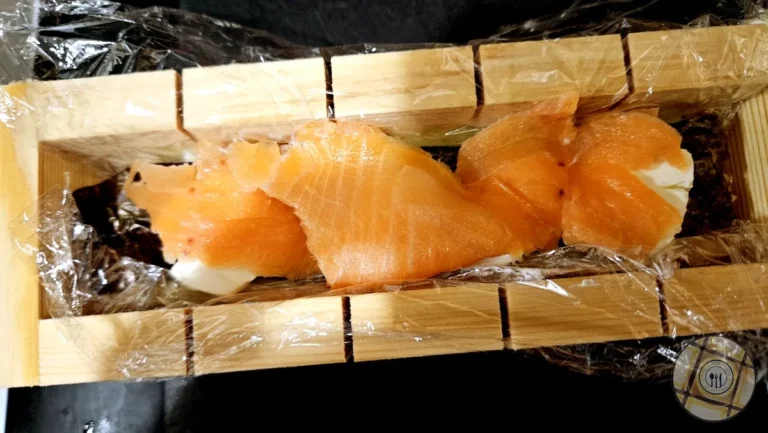
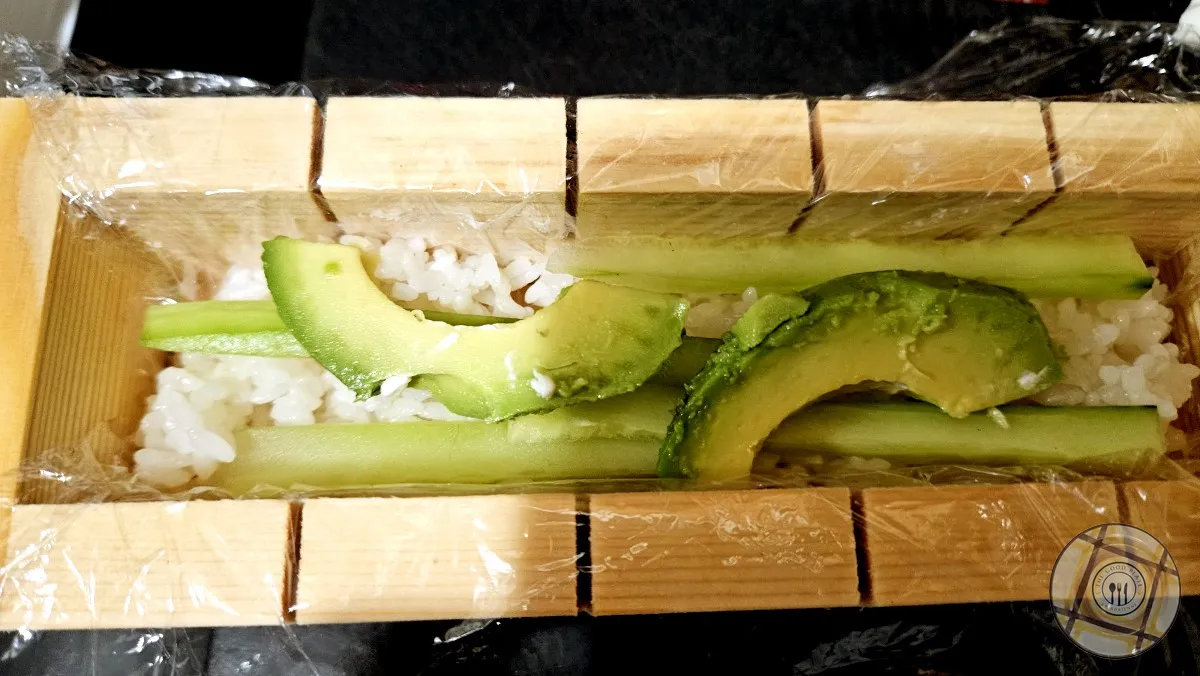
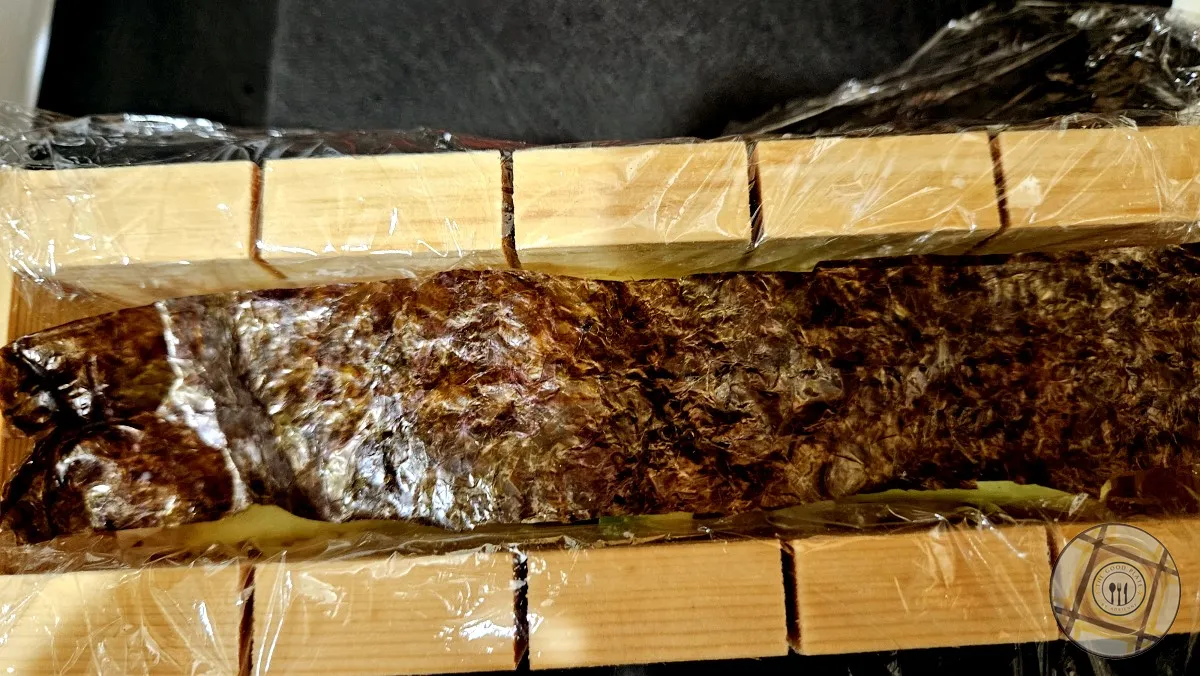
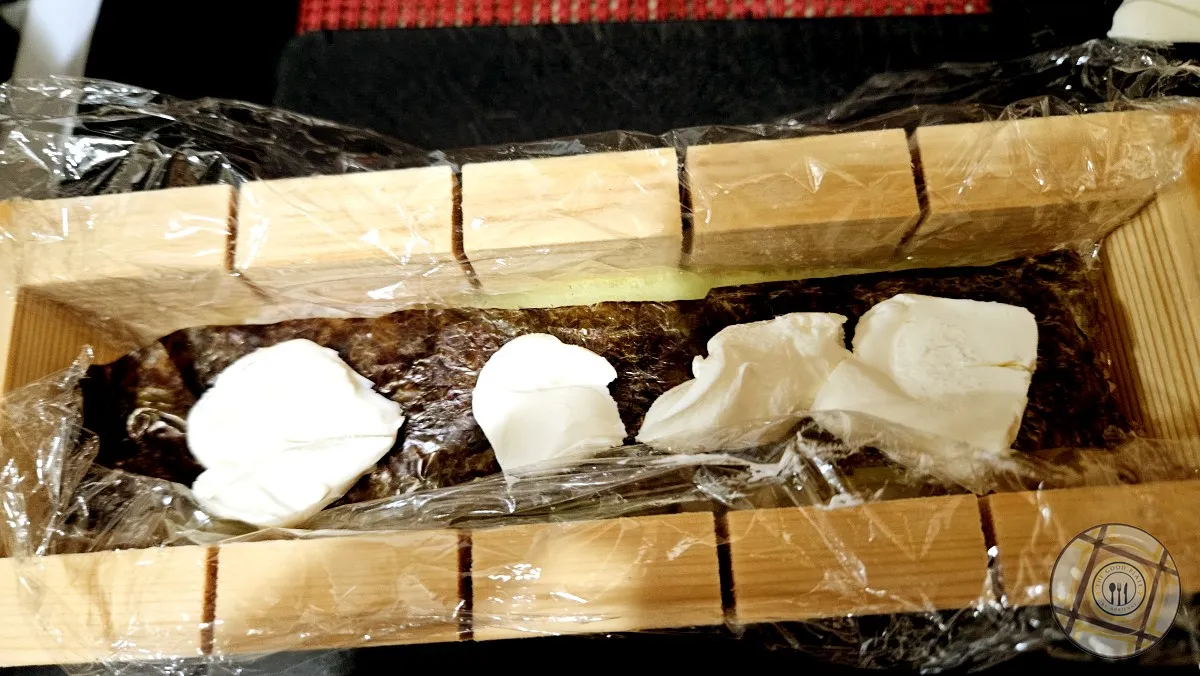
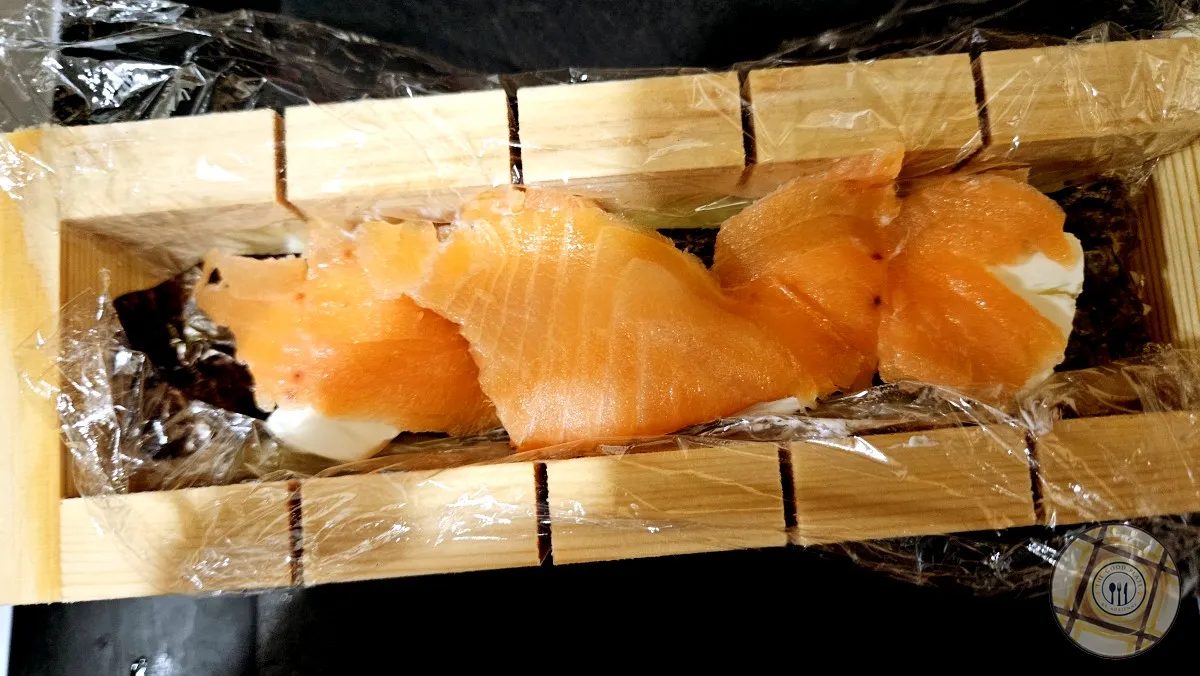
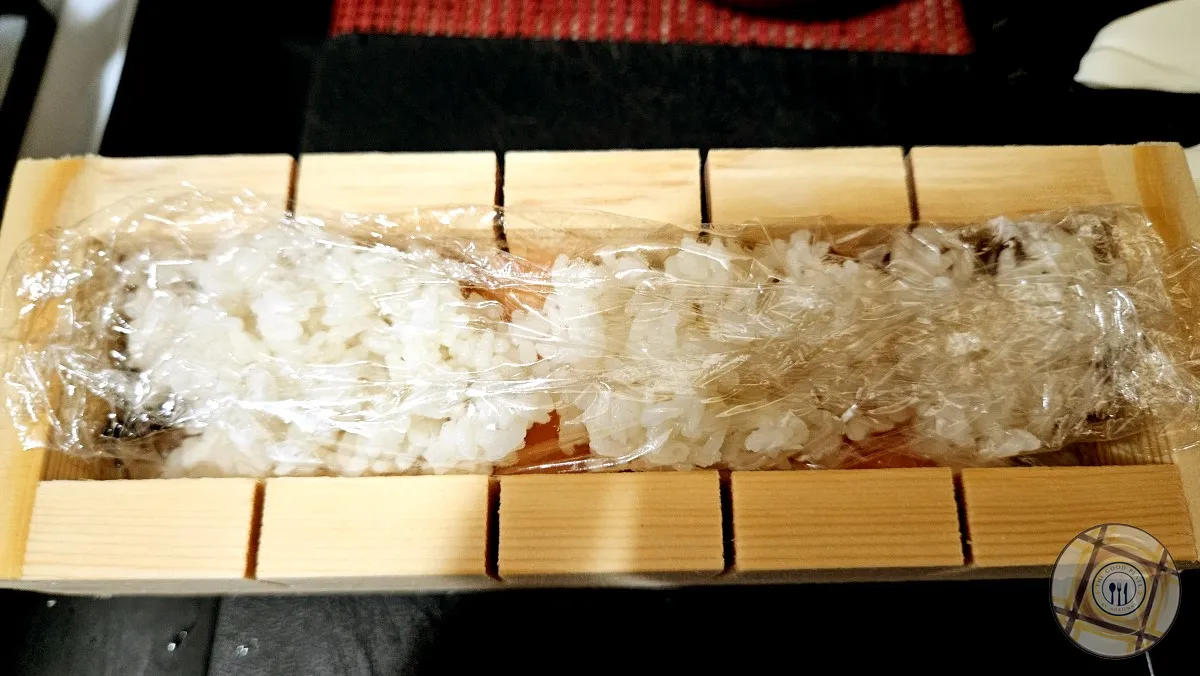
- 1 cucumber, 1 avocado, 2 sheets nori, 4 ounces smoked salmon, 4 ounces cream cheeseLine the mold with a piece of plastic wrap large enough to wrap over the edges. Start layering.
- Put a small layer of rice
- followed by cucumber
- avocado

- a small sheet of nori
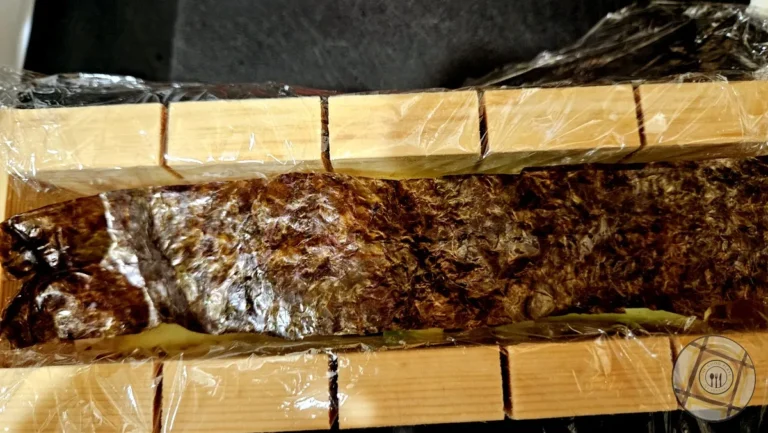
- cream cheese

- Salmon
- and more rice.

- Bring the sides of the plastic wrap up and fold them over the sushi. Put the top of the mold on and press down evenly. Remove the top and carefully remove the sushi from the mold. Remove the plastic wrap from the top and sides. Cut along the marked sides and transfer the pieces to a serving plate or platter.

- 1 teaspoon Sesame seedsContinue making more sushi with the remaining ingredients. Sprinkle sesame seeds of the sushi before serving.


Video
Nutrition
Sushi Oshizushi Video Transcript
Transcript
Good afternoon and welcome to the Good
Plate’s kitchen.
Today we’re making sushi.
But not the kind you roll with a bamboo
mat.
We’re making pressed sushi, called,
oshizushi.
That’s oh-she-zoo-she
Say it with me.
Oh shi zushi!
It’s one of the oldest styles of sushi
created over 400 years ago in Osaka to
make sushi easier to transport and keep
fresh.
The process is really simple.
First, you soak the wooden mold in water
with a little vinegar for about two hours
and then line it with plastic wrap so this
rice won’t stick.
Make your sushi rice, rinse it until the
water runs clear.
Then cook it.
I use the instant pot, just like always.
And here’s the important part.
Let it cool in the refrigerator,
not on the counter.
Rice is one of those foods.
It spoils quickly once it’s cooked, so
chilling it properly keeps it safe to eat.
Now, the fun part, layer it in the mold,
rice, cucumber, avocado, cream cheese,
smoked trout, a sheet of nori,
and more rice.
Then press it down, lift the lid,
and slice along the guide marks.
It comes out neat, even squares of sushi
and sprinkle it with sesame seeds.
I used both regular sesame seeds and black
sesame seeds to make it look elegant.
It tastes amazing and it’s so much easier
than trying to roll sushi by hand.
And the best part, you can fill oshizushi
with almost anything you’d like.
Thanks for listening.
This is Adrienne from The Good Plate.
Ever forward, ever flavorful.
Yum, yum!